TL;DR
1
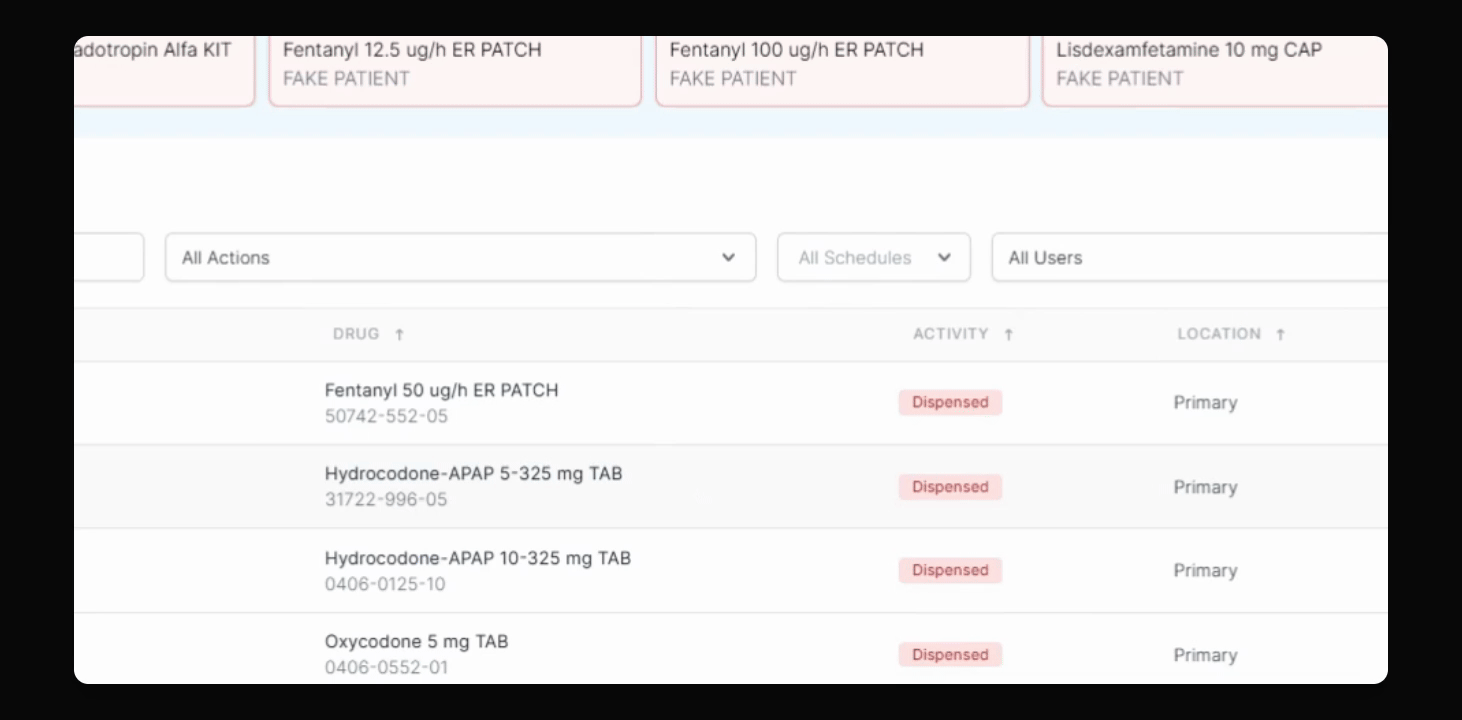
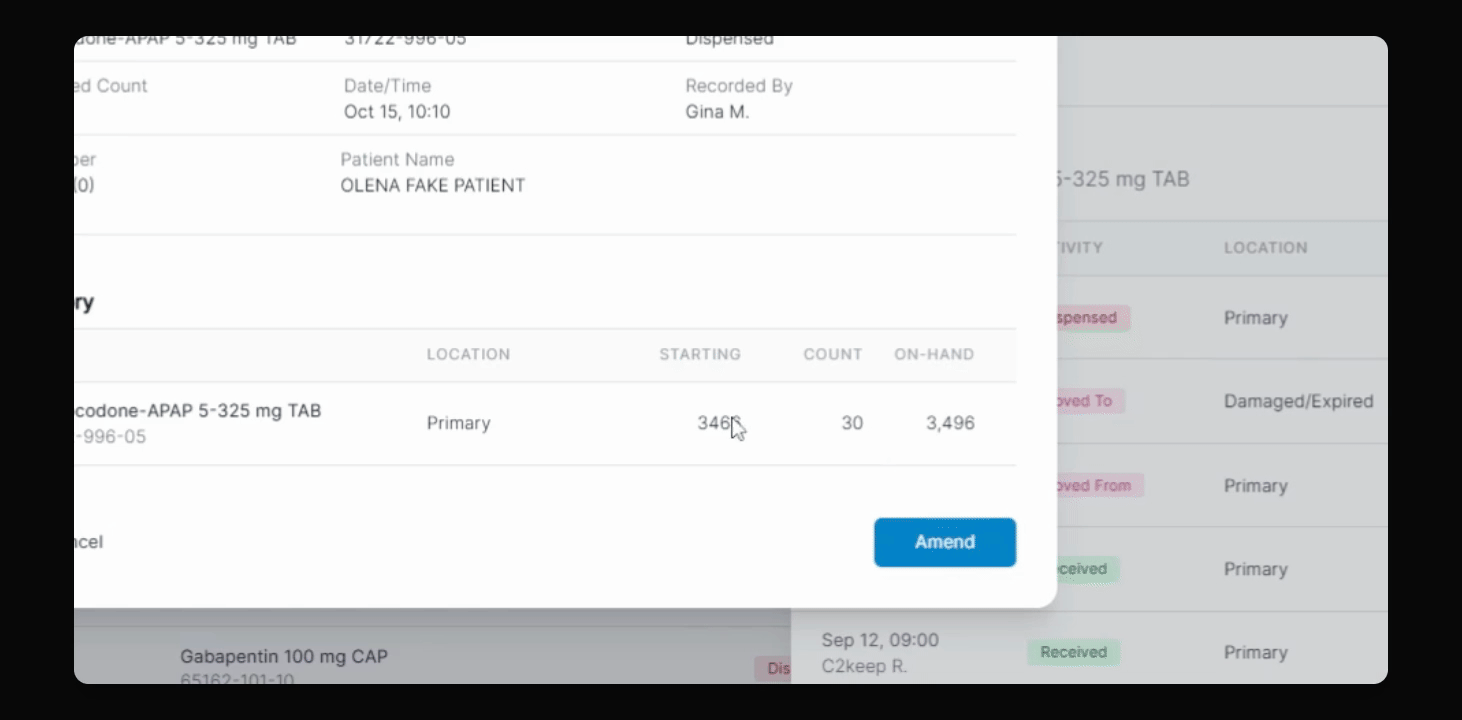
Locate the Transaction
Select the dispensed transaction you want to amend.
2
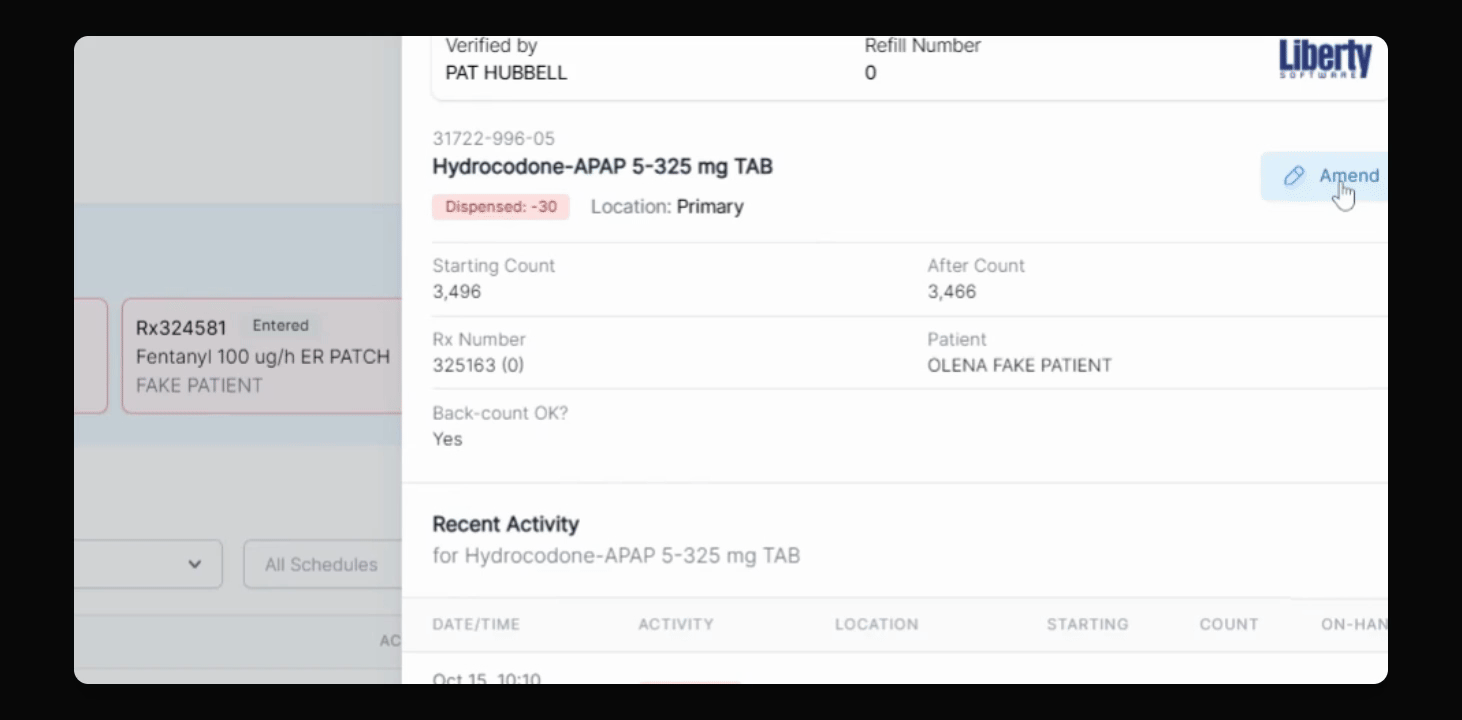
Click the Amend Icon
Open the amend window with the amend icon.
3
Select Reason
Choose a reason for amending, like Return to Stock.
4
Verify Details
Check that the transaction date and time are correct.
5
Enter PIN
Click Amend and enter your 4 digit PIN.
6
Complete Witness Requirement
Ensure a witness is present if you're a staff member.
7
Confirm Amendment
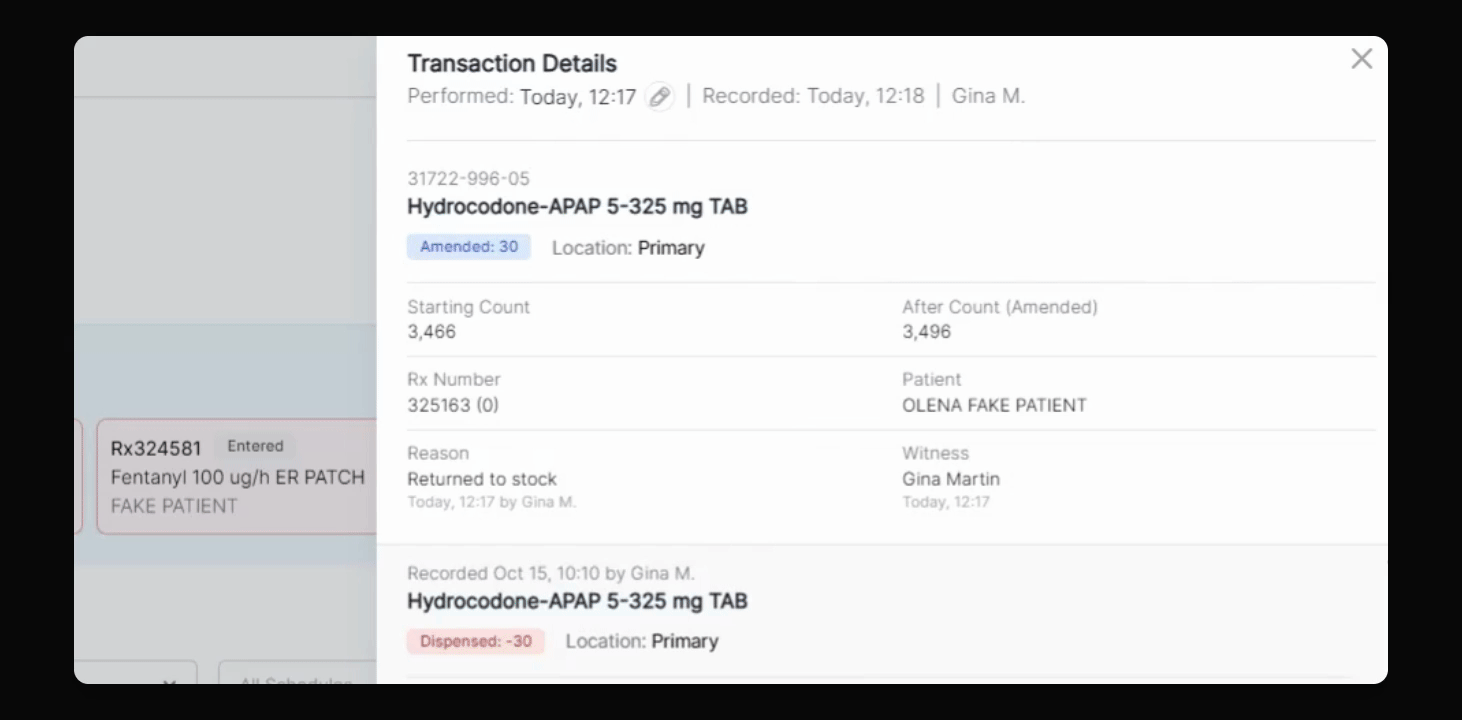
Transaction is now successfully amended.
Let's Do It Together!
Step 1: Locate the Transaction
Find the transaction you want to amend from the list below.
Select the dispensed transaction.
Step 2: Select the Amend Icon
Click on the amend icon.
A new window will pop up.
Step 3: Choose the Reason for Amending
Under why are you amending this record?, select the caret to view options.
Choose Return to Stock if applicable.
Alternatively, select any other option that fits your issue.
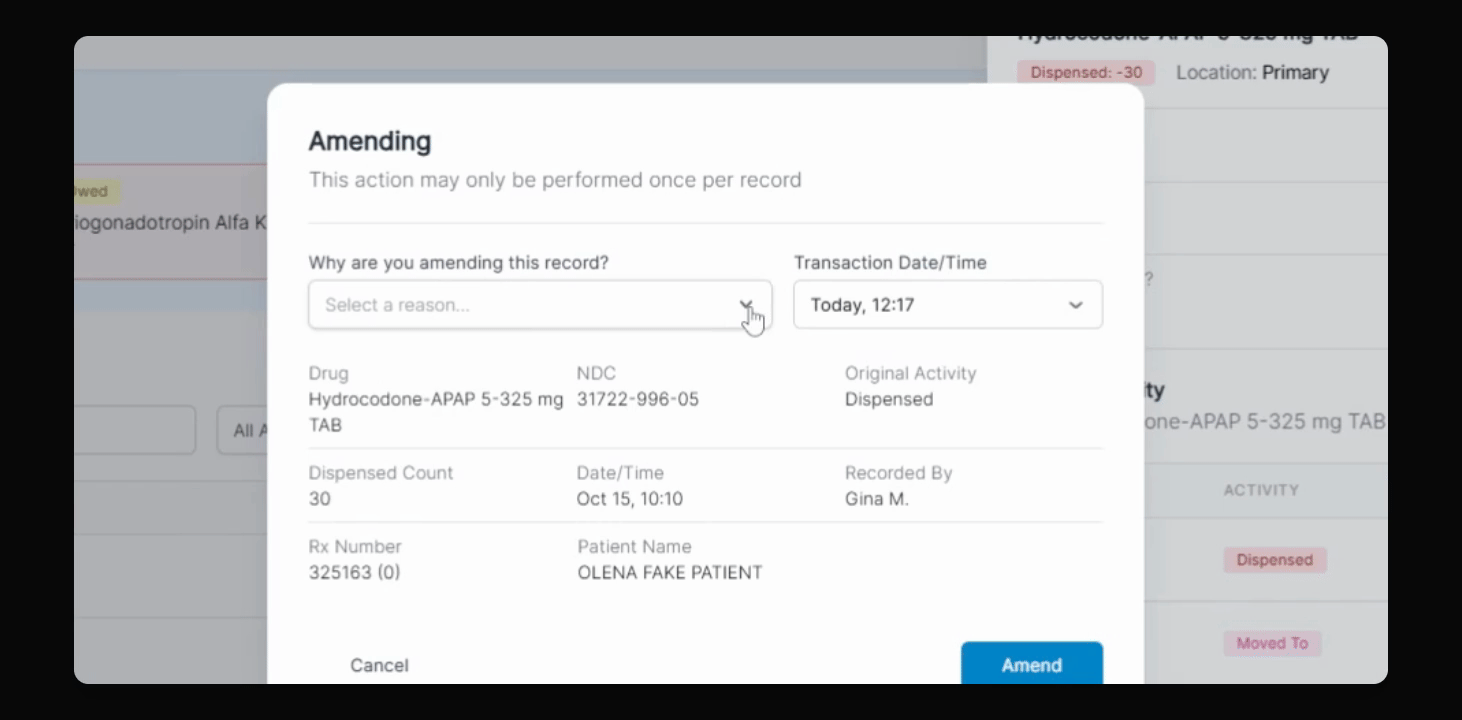
Step 4: Confirm Transaction Details
Ensure the transaction date and time are correct.
Step 5: Complete the Amendment
Select the Amend button to return the item to stock.
Enter your 4 digit PIN.
If you are a pharmacy admin, enter your PIN twice to confirm.
Step 6: Witness Requirement
Note that this transaction requires a witness.
If you are pharmacy staff, another person must witness the transaction.
Step 7: Verify the Amendment
Your transaction has been successfully amended.
The transaction will now show as amended below.