TL;DR
1
Open Settings
Navigate to Settings and find Wholesaler Order Integration.
2
Add New
Click Add New and continue.
3
Enter Details
Input Wholesaler name and select it.
4
Connection Info
Enter server URL, folder path, and credentials.
5
Test Connection
Click Test Connection to verify.
6
Finish Setup
Select Finish to complete the integration.
Let's Do It Together!
Step 1: Navigate to Settings
Click on the Settings icon on the left side.
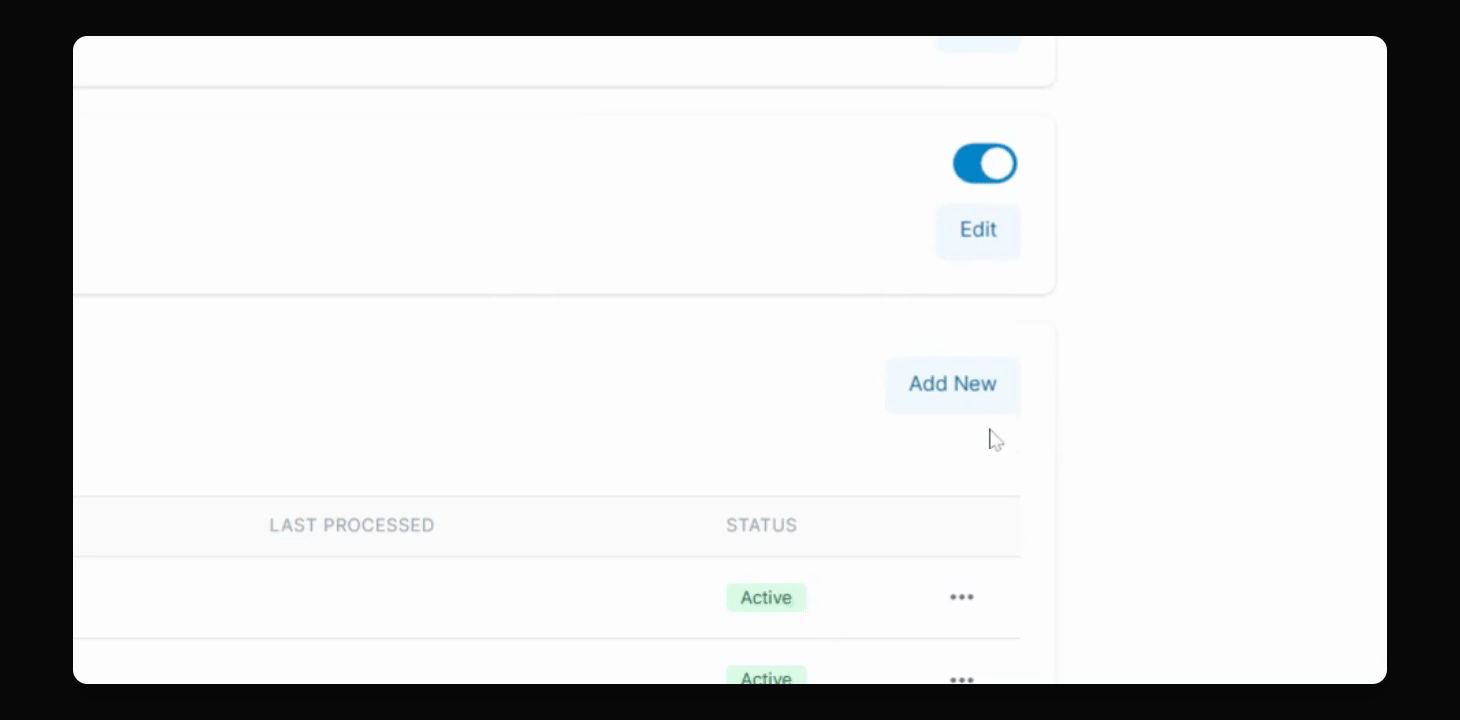
Scroll down to find Wholesaler Order Integration.
Step 2: Add New Wholesaler
Select the Add New button.
Click Continue.
Step 3: Enter Wholesaler Details
Input your new Wholesaler name and click the Add button.
Select the newly added name from the dropdown menu.
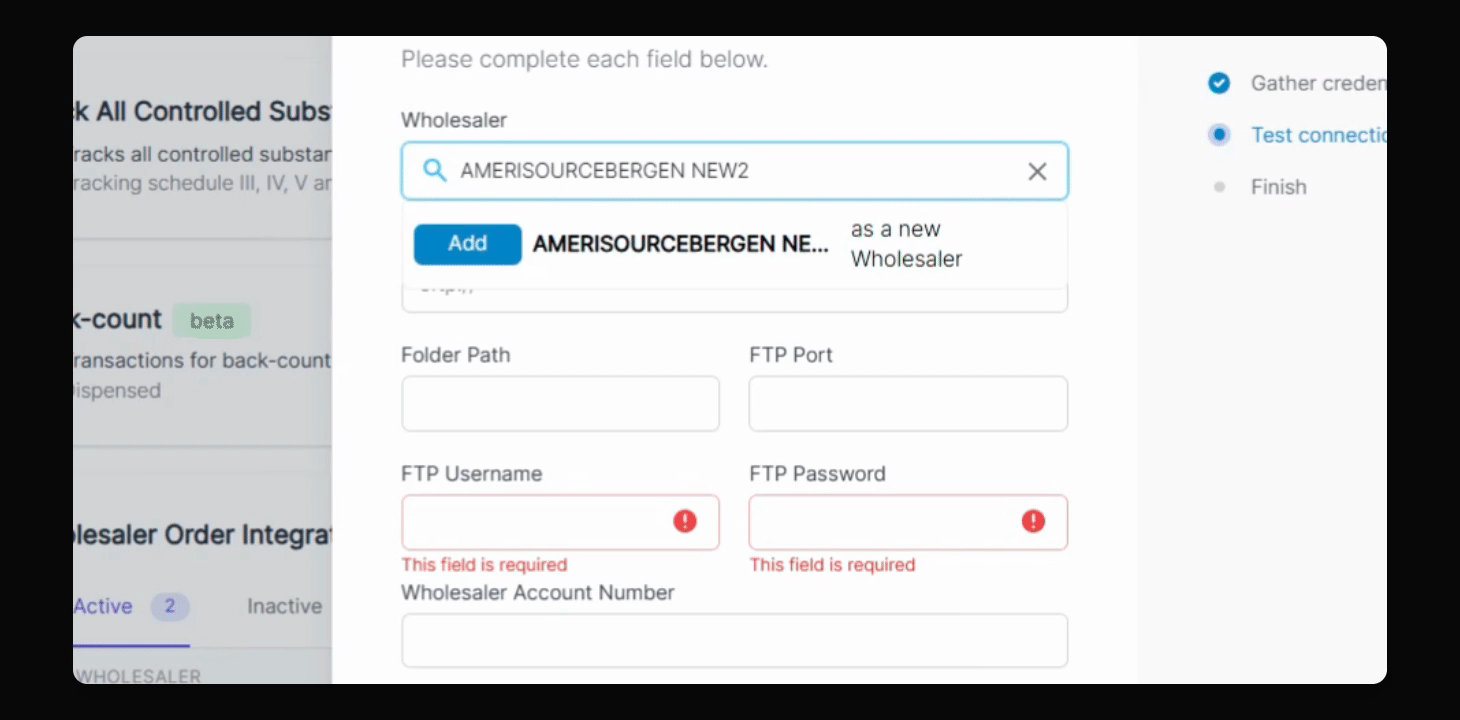
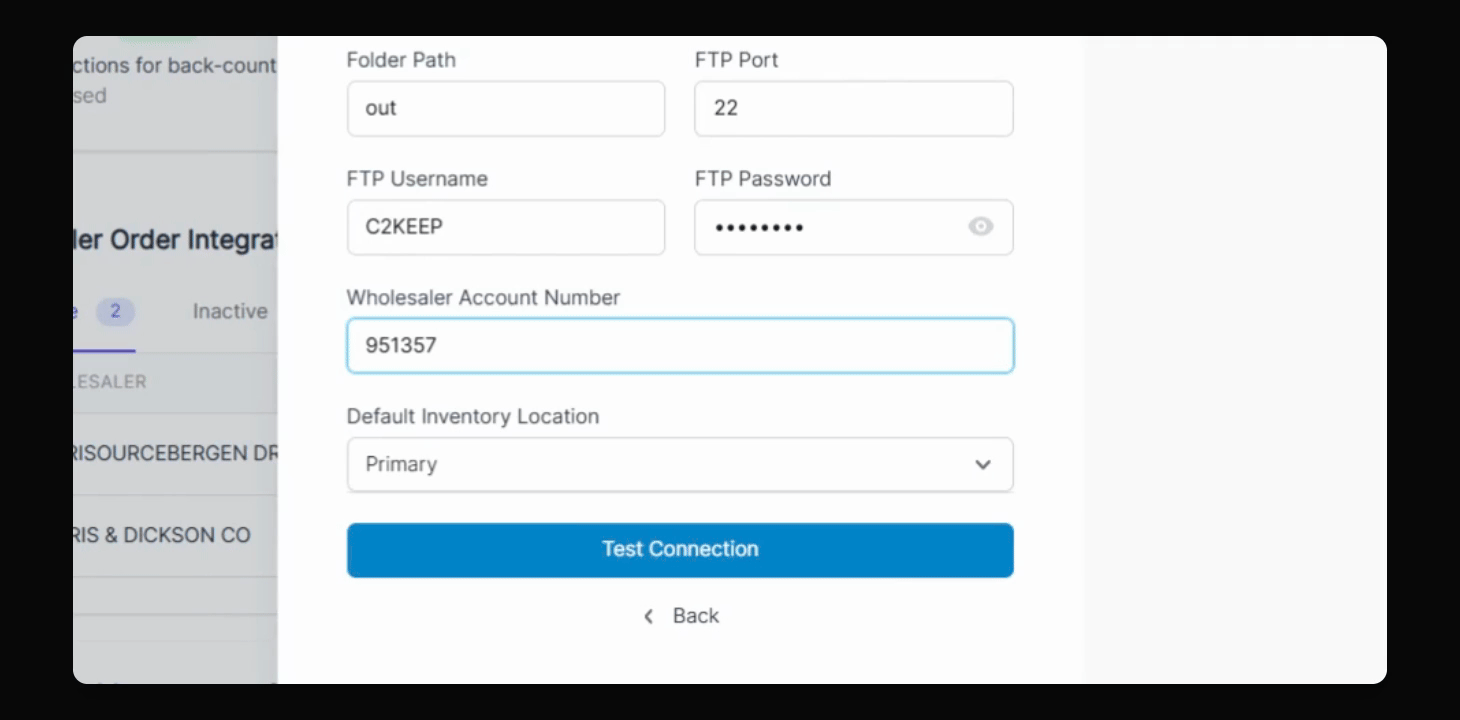
Step 4: Enter Connection Information
Type your server URL.
Input your folder path.
Enter your FTP port number.
Type in your username.
Input your password.
Finally, enter your Wholesaler account number.
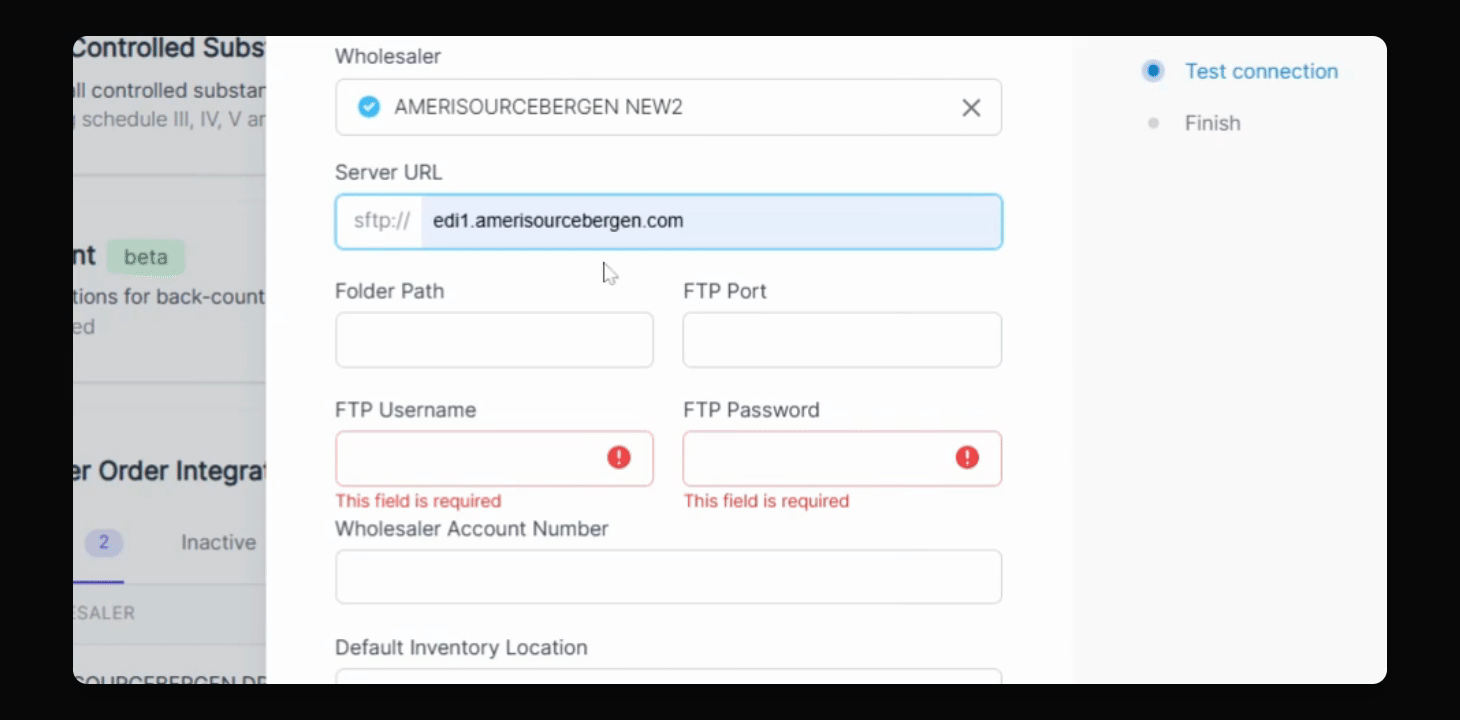
Step 5: Test Connection
Select the Test Connection button.
If successful, you will see a confirmation message.
Step 6: Finish Setup
Select Finish when done.