

This guide walks you through configuring the transmission of each group's NPI number from Microsoft Entra to C2 Keep. Let's look at the steps:
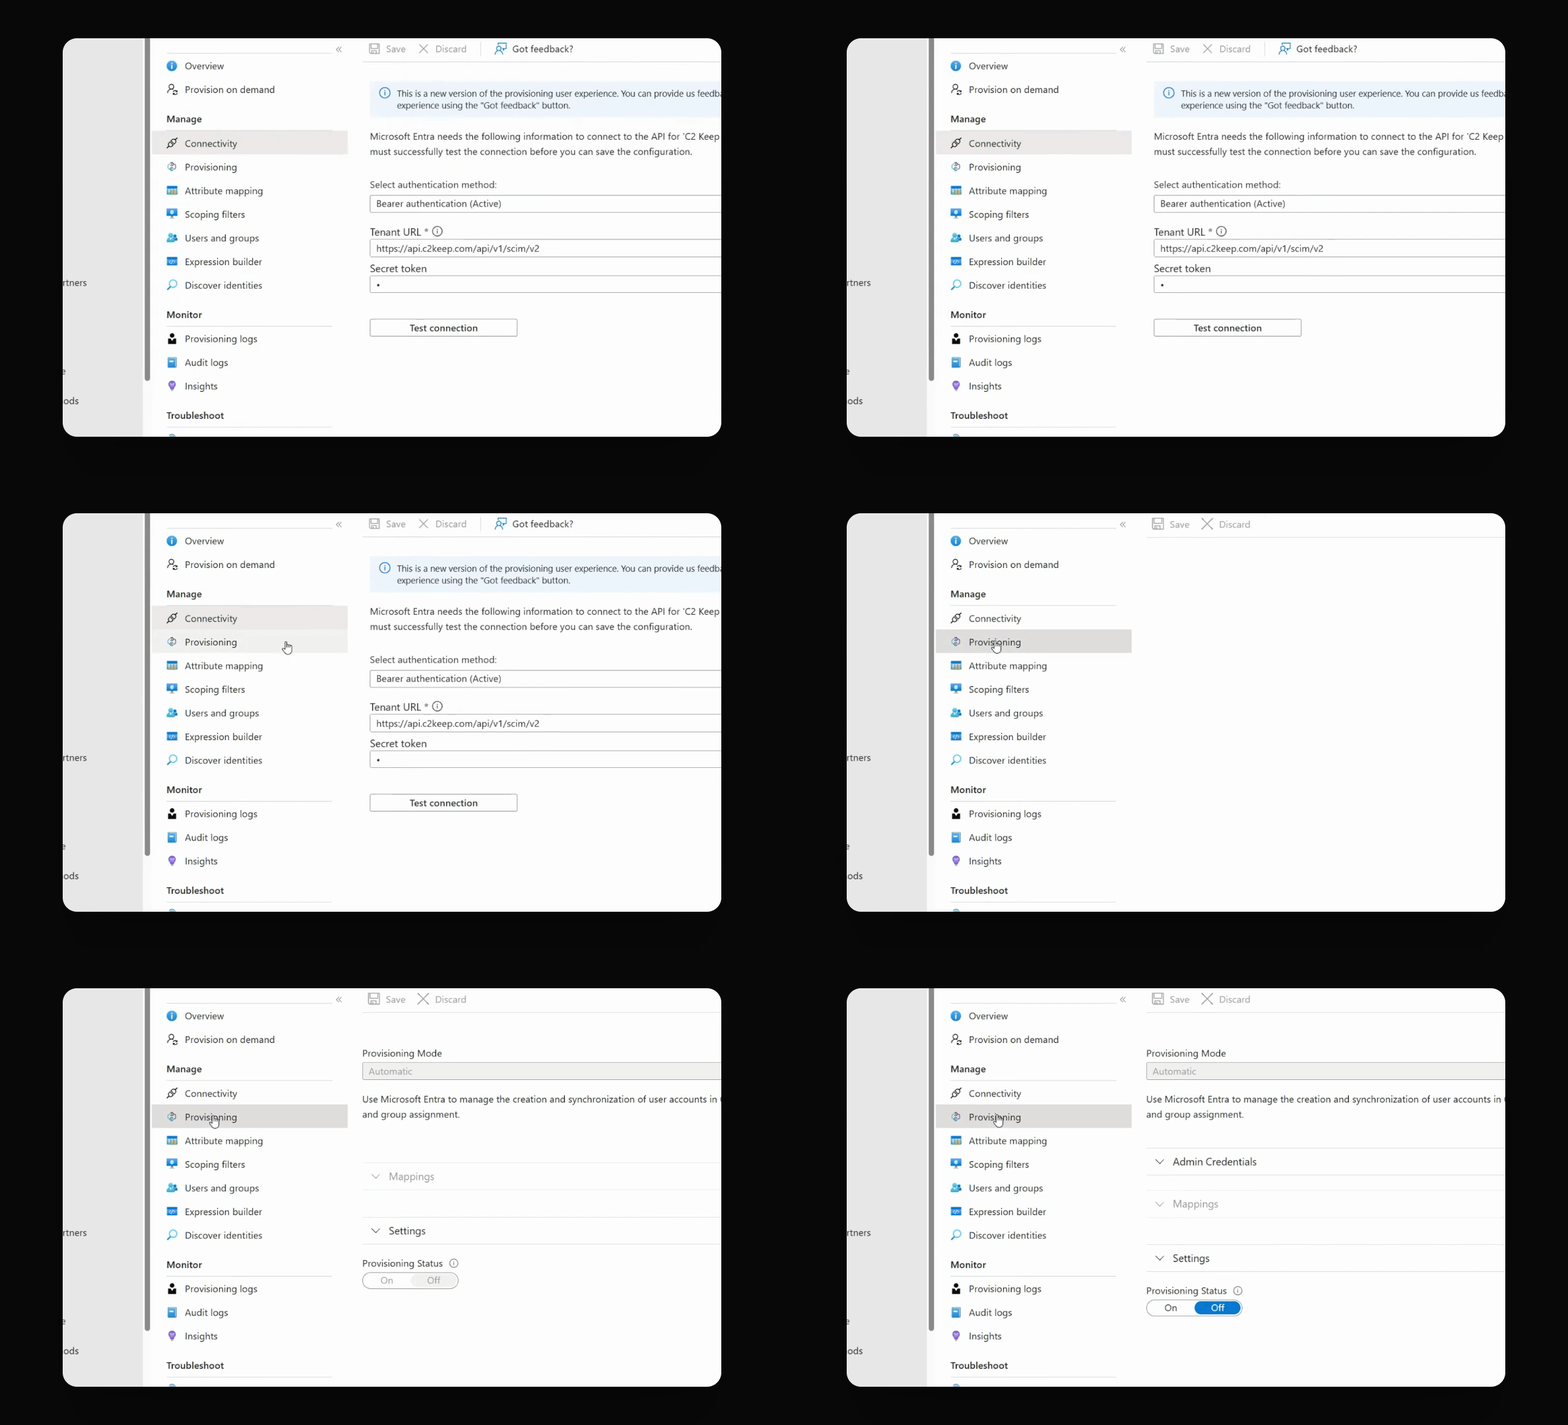
Step 1: Open Provisioning in Entra
In the enterprise application you created, navigate to Provisioning.
Step 2: Edit Attribute List
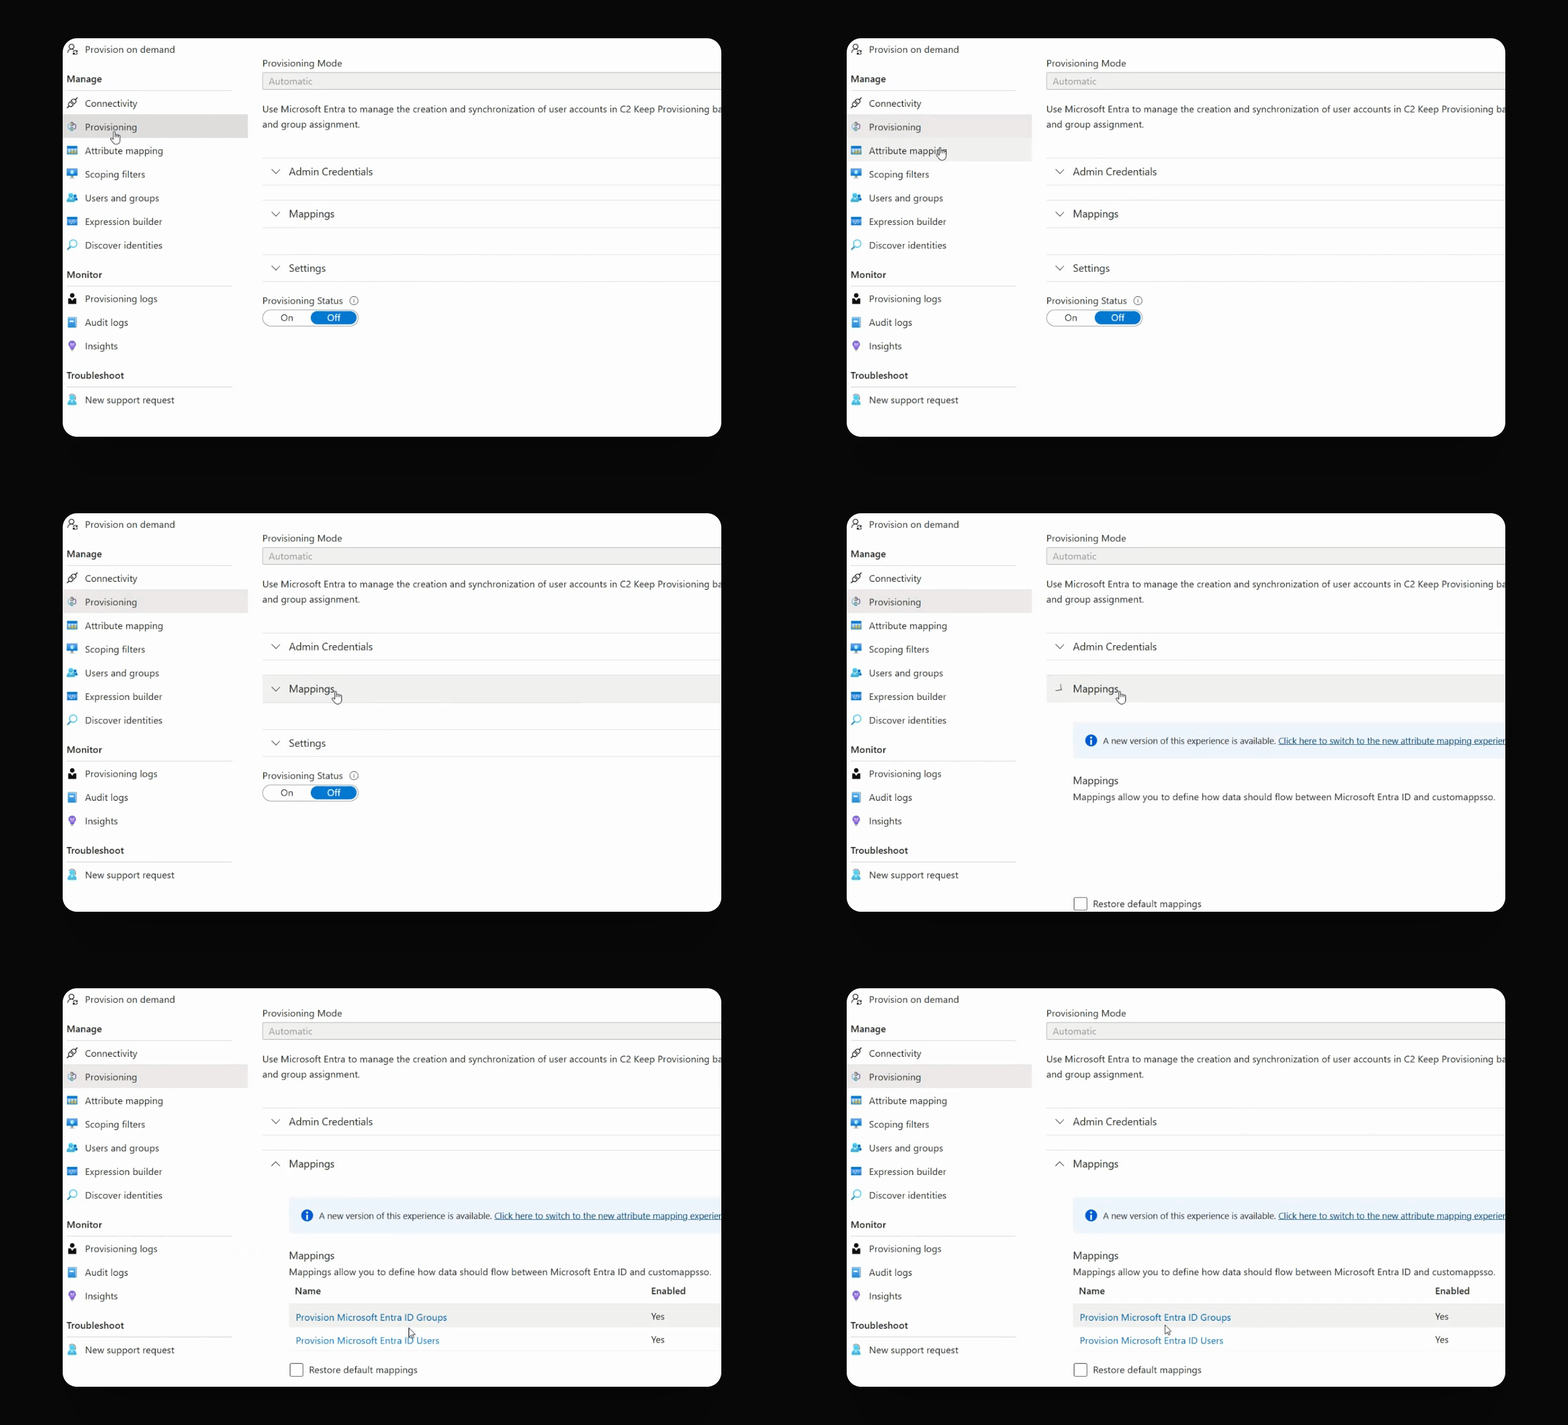
Under Mappings, select Provision Microsoft Entra ID groups, show advanced options, and edit the attribute list for the custom map. Go back to C2 Keep, copy the attribute name you want, paste it into the attribute list, and click Save.
Step 3: Add and Configure Attribute Mapping
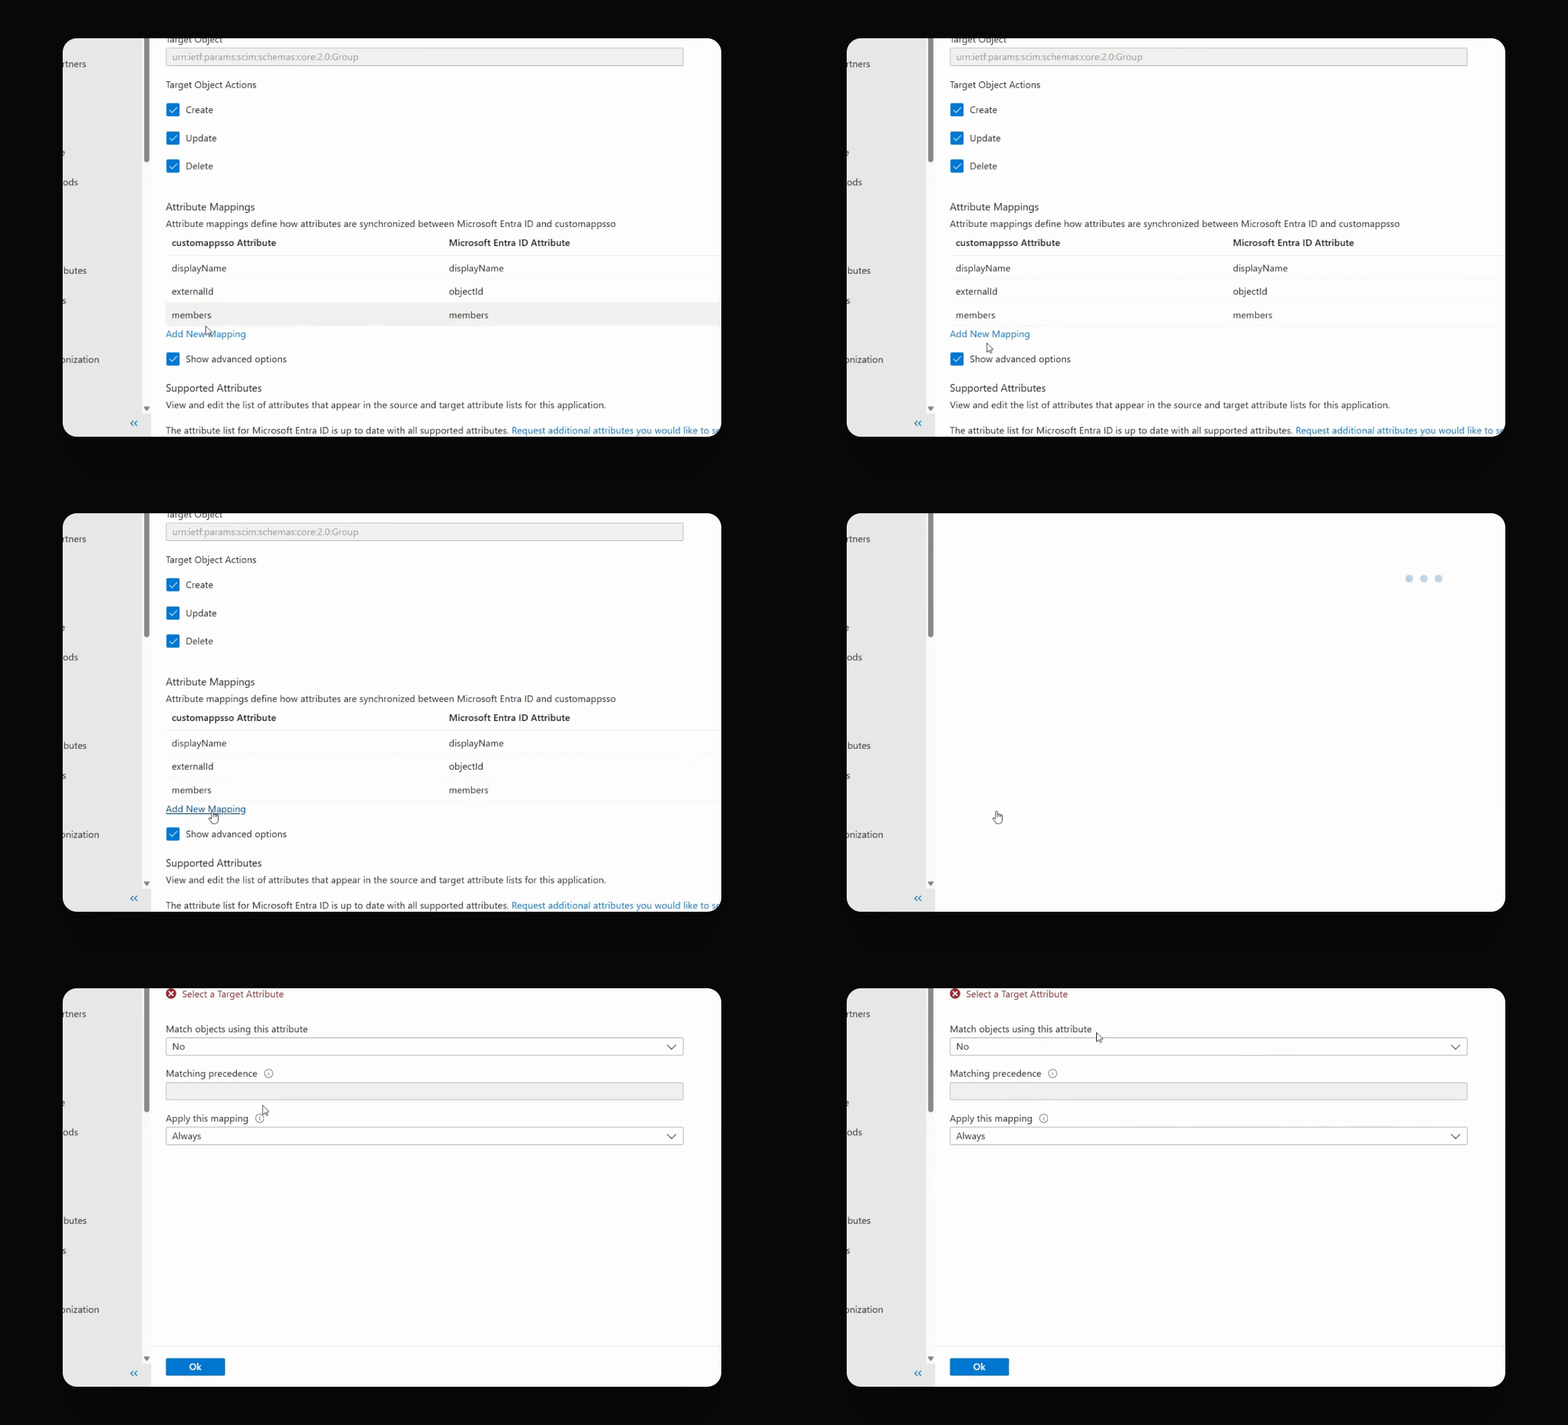
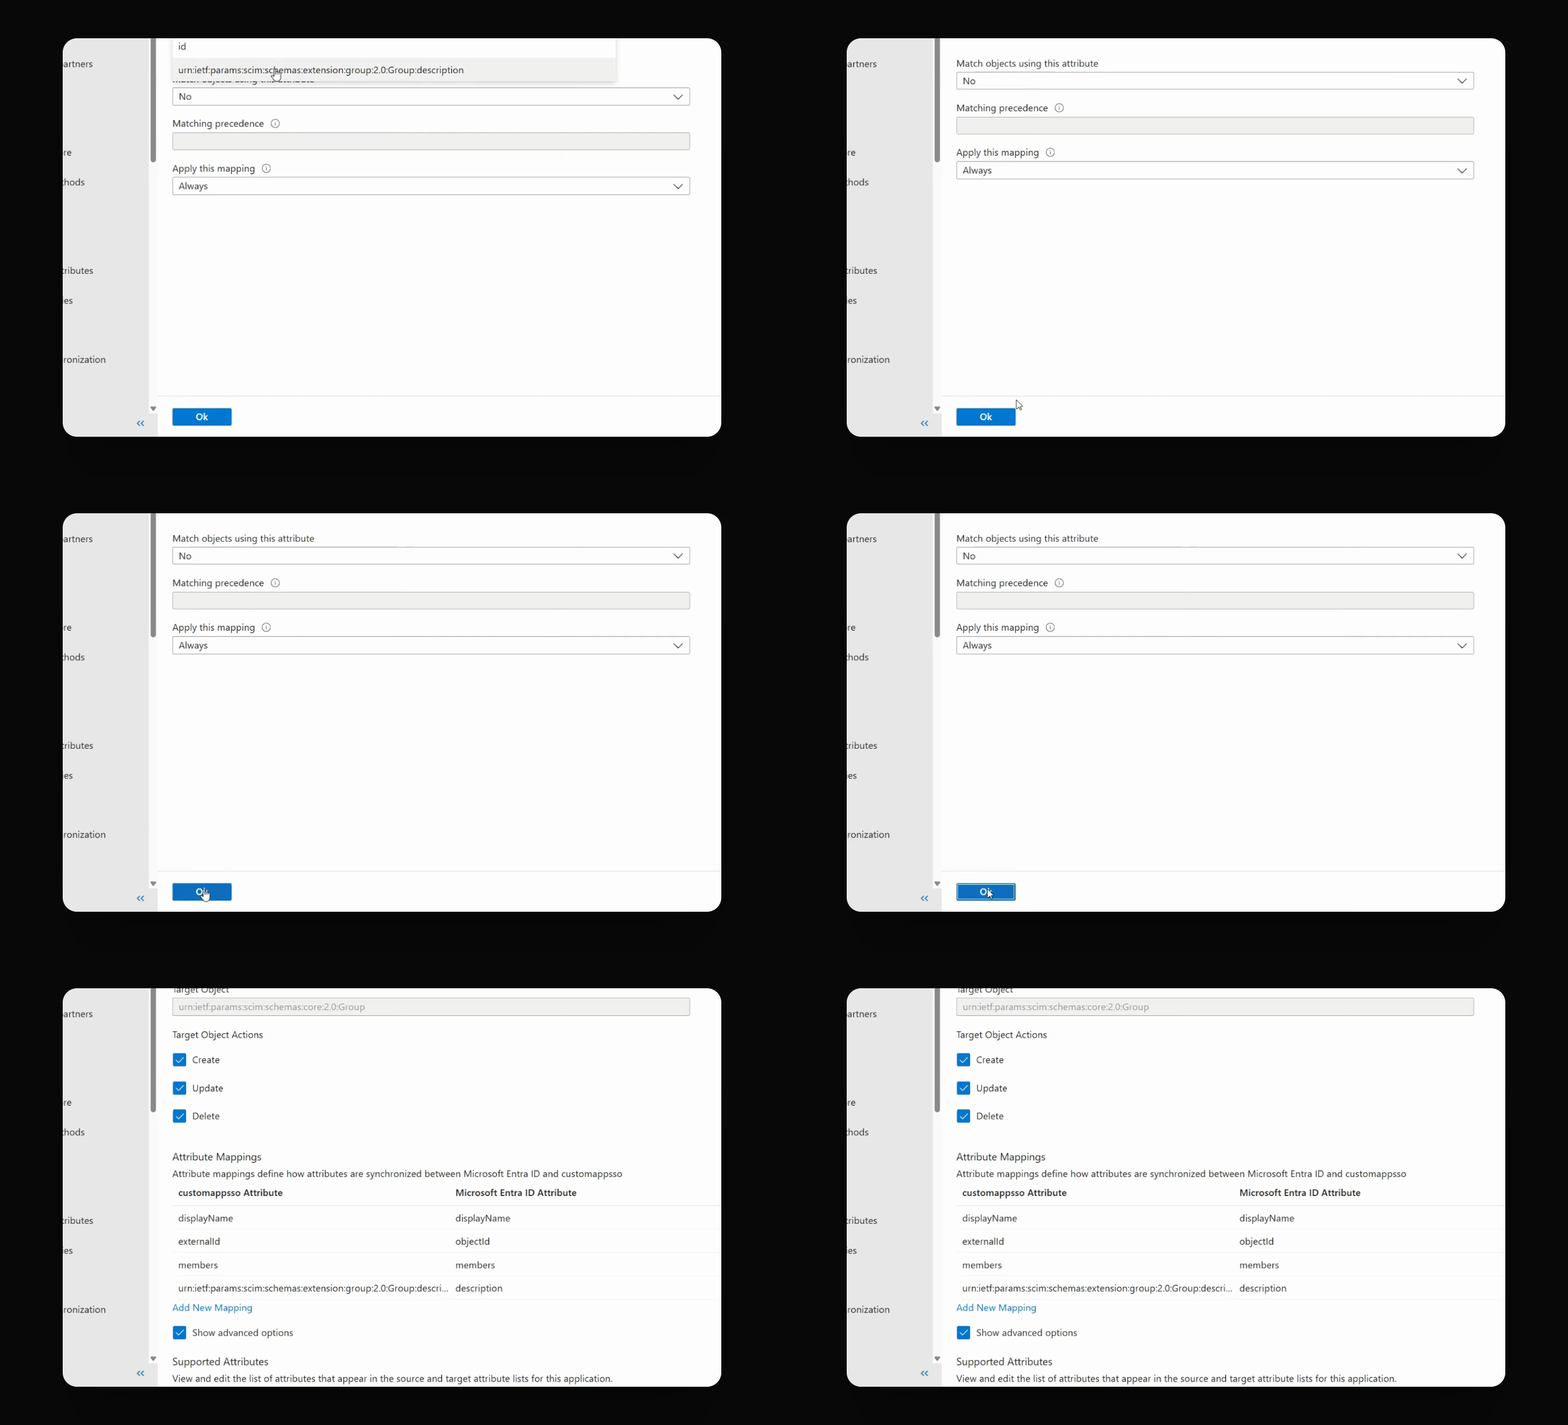
On the redirected page, under Attribute mappings, click Add New Mapping. Configure the group attribute mapping with mapping type Direct. Set the source attribute description and use the target attribute you just created.
Step 4: Save and Return to Provisioning
Click OK to save. Then go back to Provisioning.
Step 5: Assign Groups to Provision
Go to Users and Groups. Click Add User and Group and select the pharmacy security groups you want to synchronize with C2 keep.
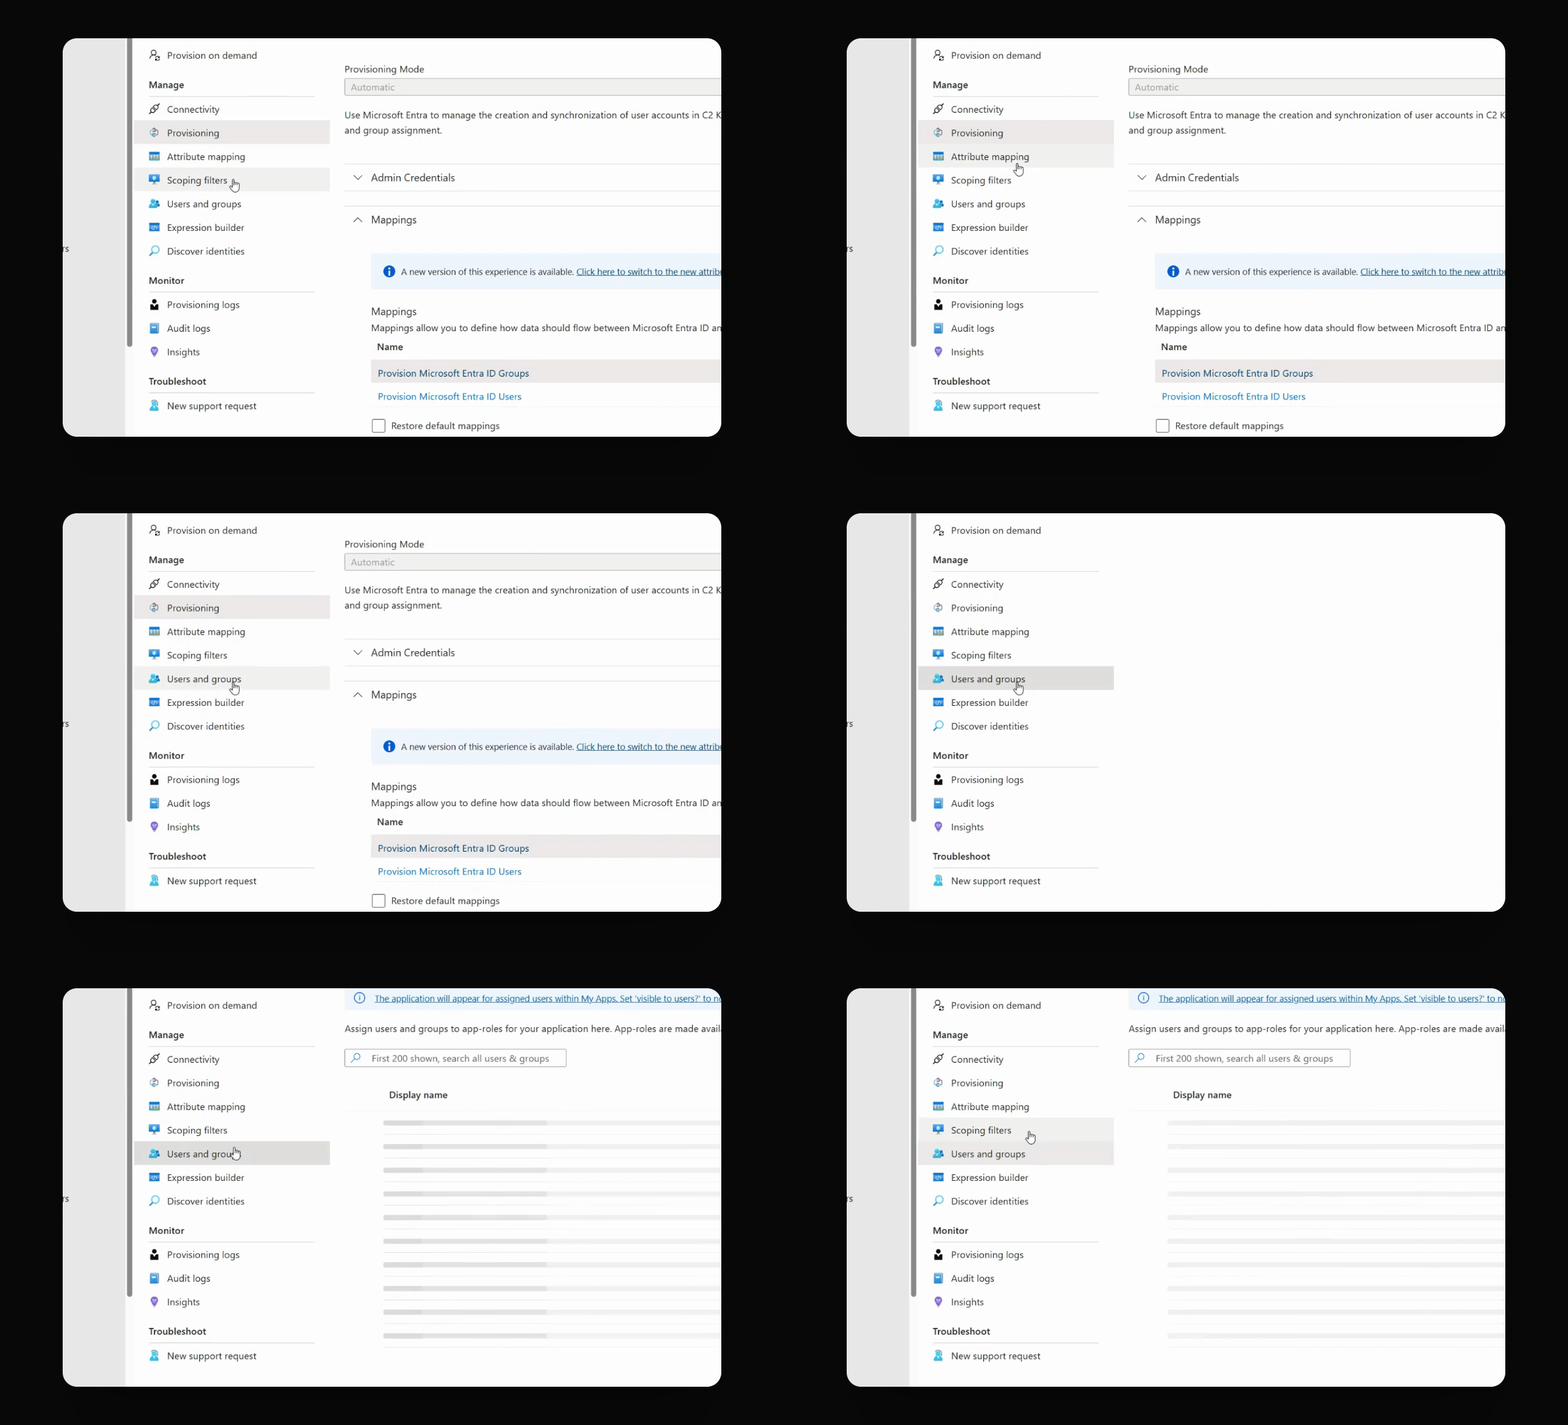
Step 6: Complete Group Assignment
Keep and complete the assignment for the selected groups.
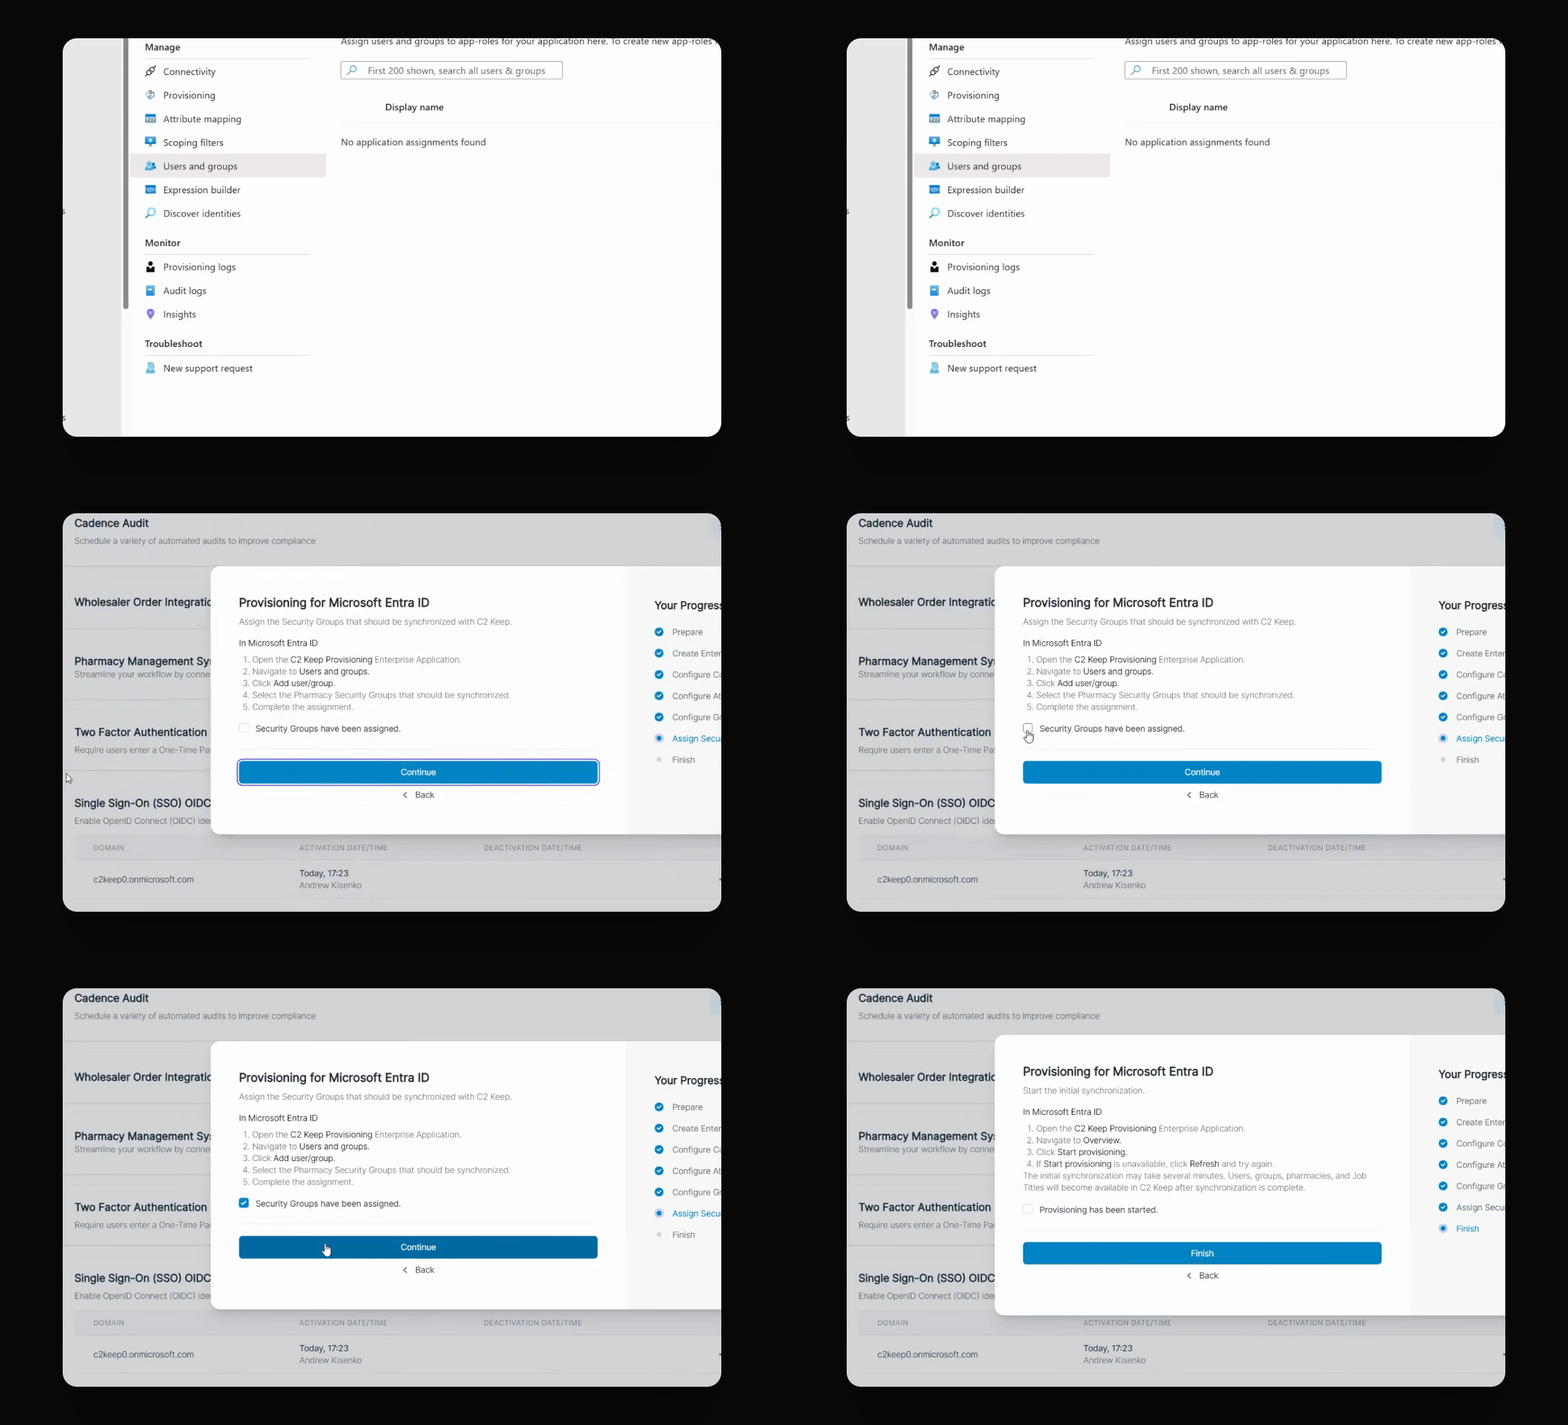
Step 7: Start Provisioning
Navigate to Overview and click Start Provisioning.
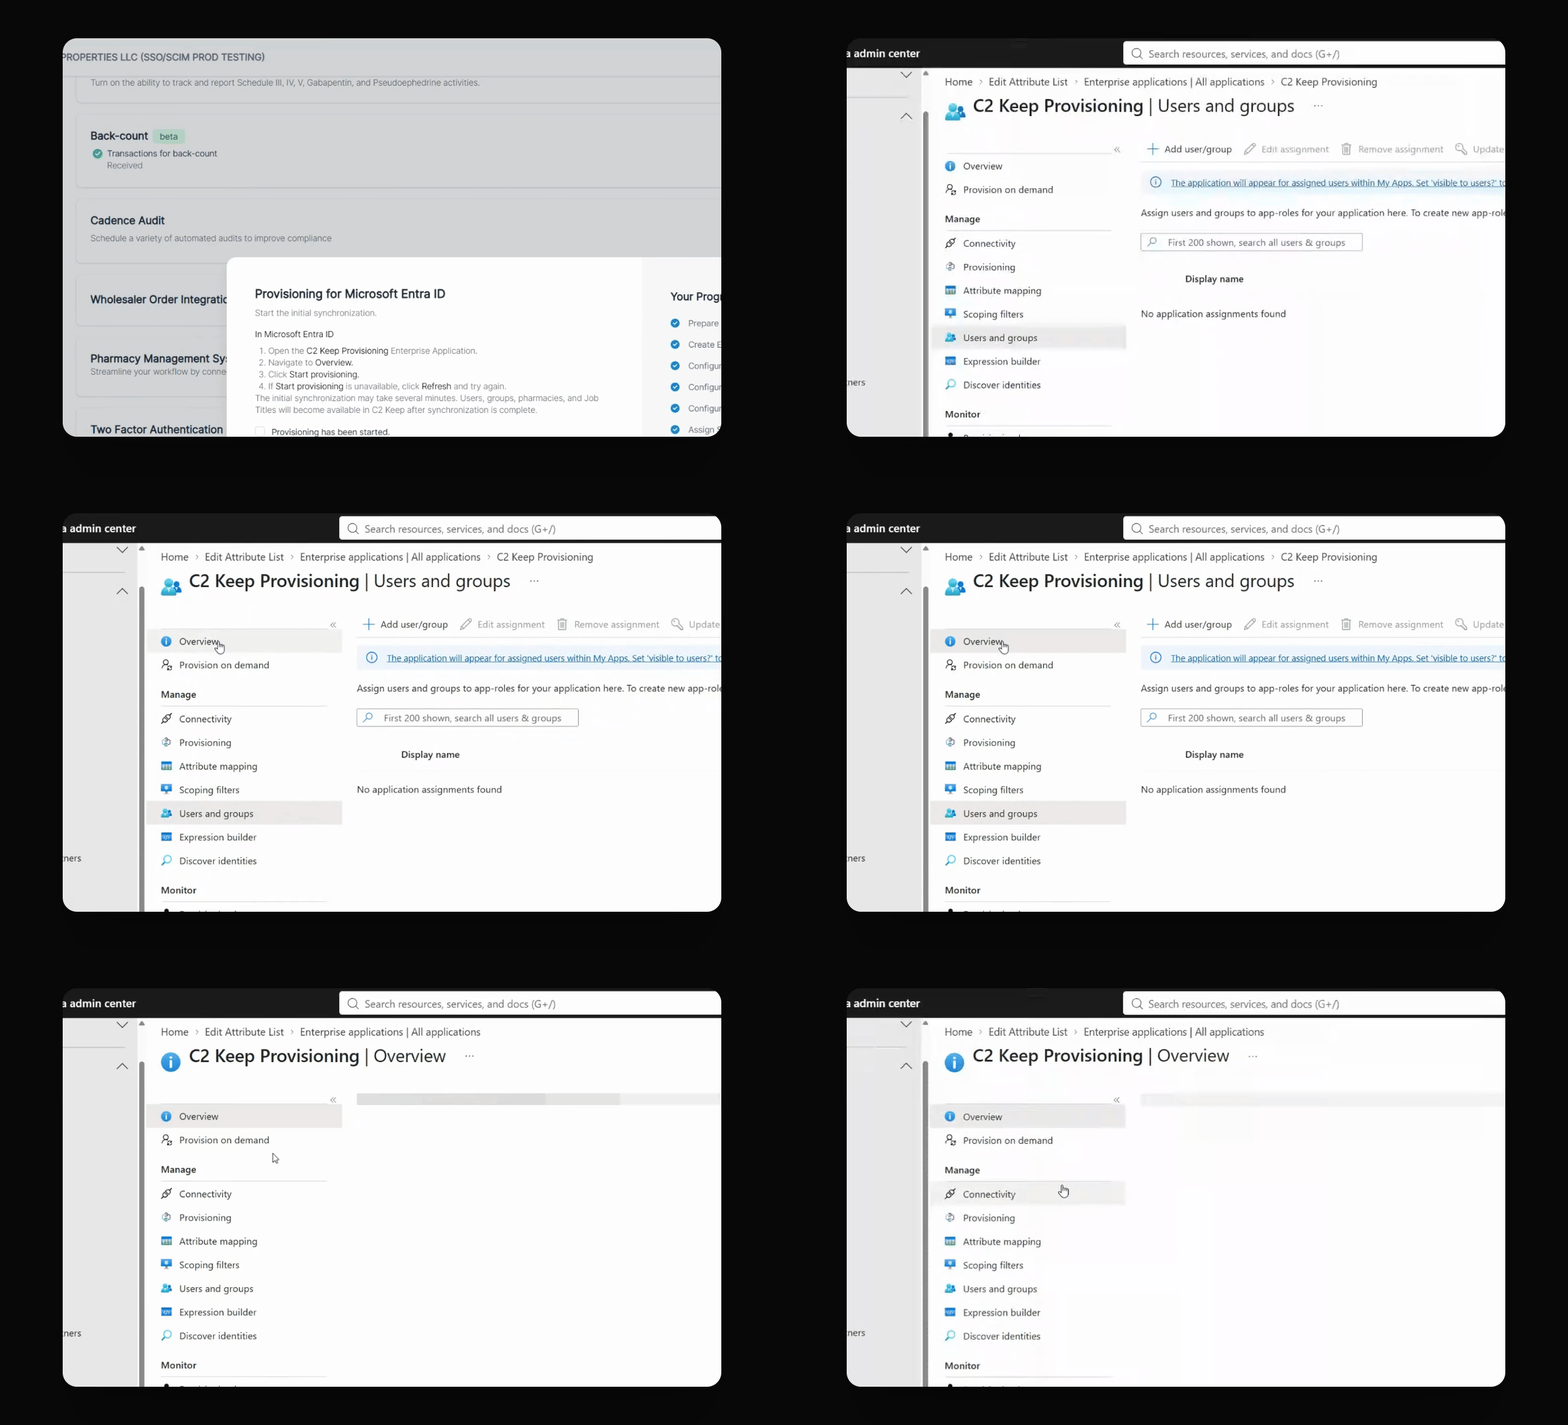
Step 8: Finalize in C2 Keep
Finish setup in C2 Keep by entering your PIN.
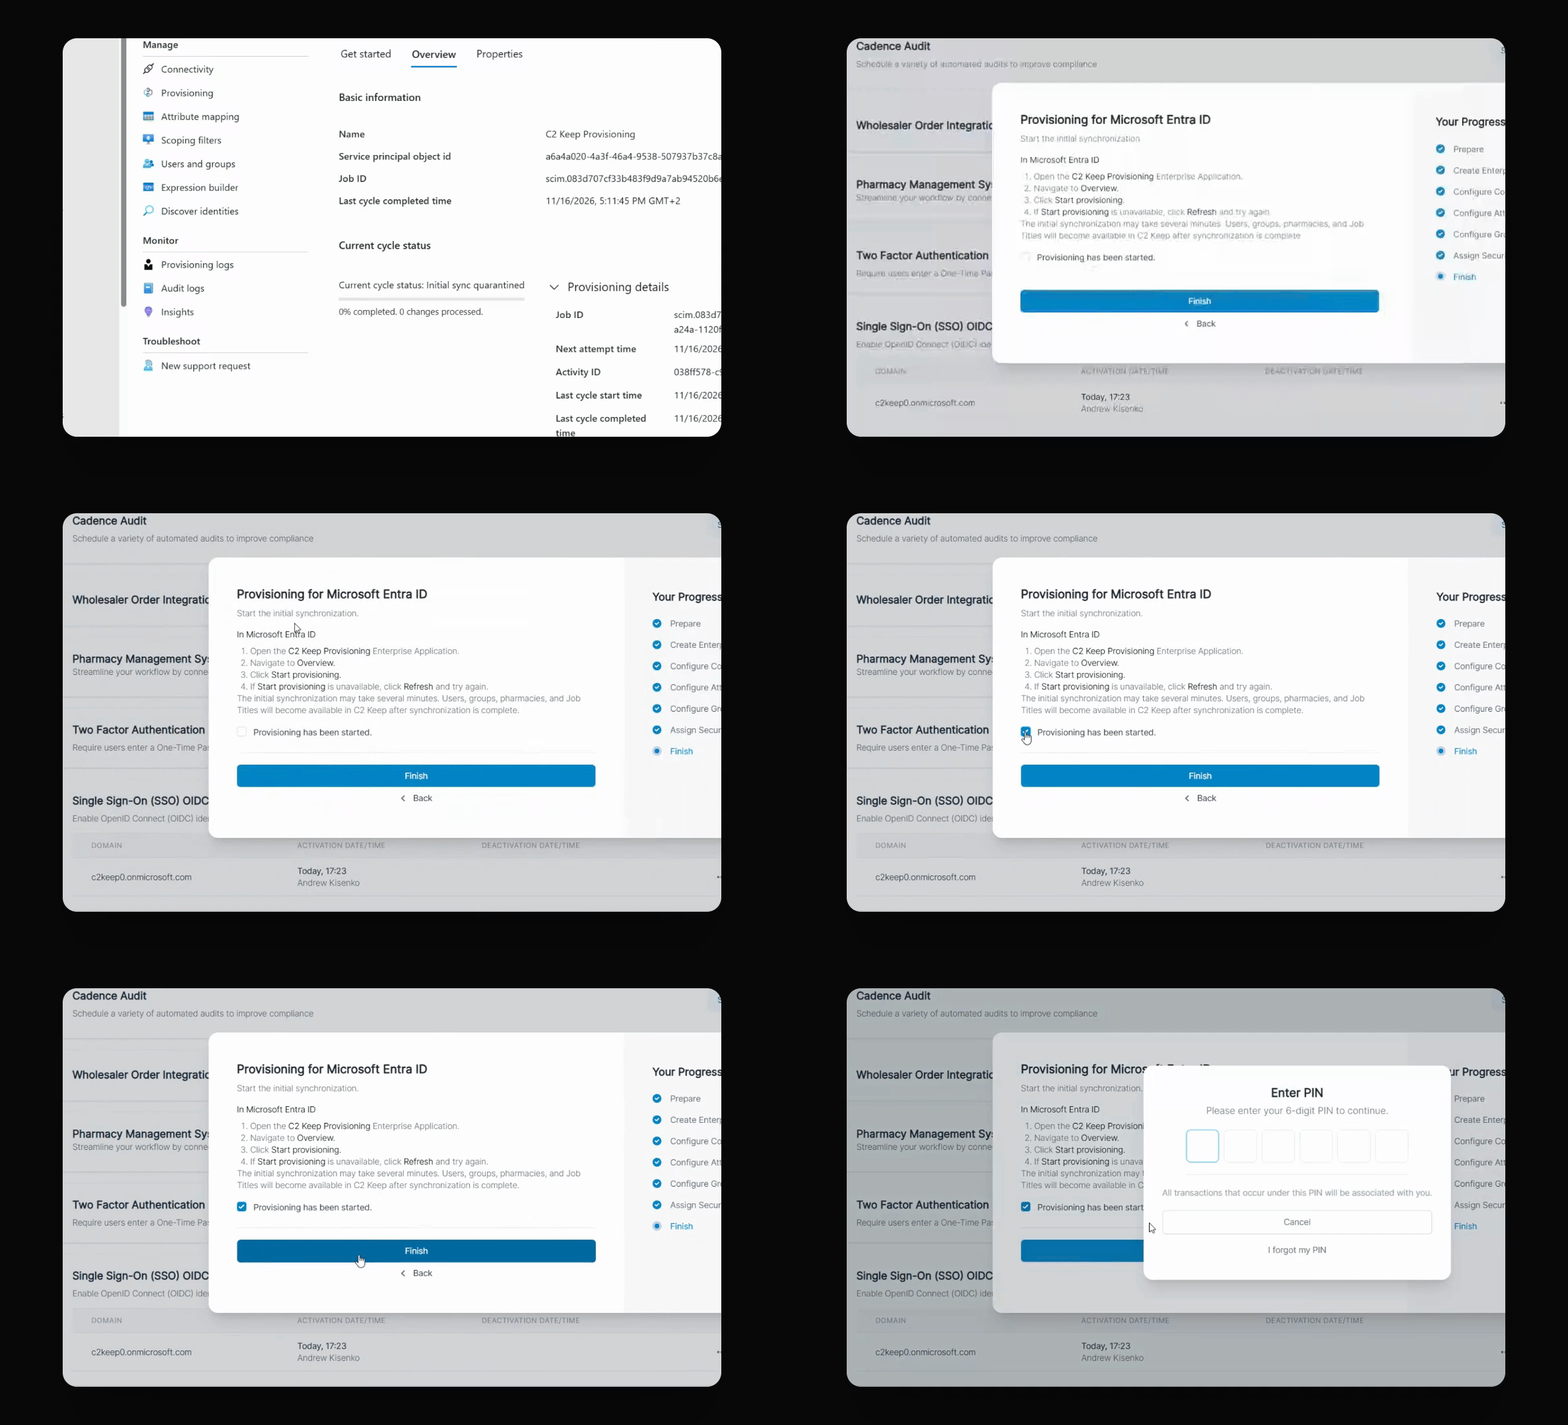
You've successfully configured provisioning between Microsoft Entra and C2 keep.