

This tutorial explains how to record a remote fill transaction in your inventory system. Before you begin, ensure your inventory locations are set up. Let's look at the steps:
Step 1: Open Remote Fill
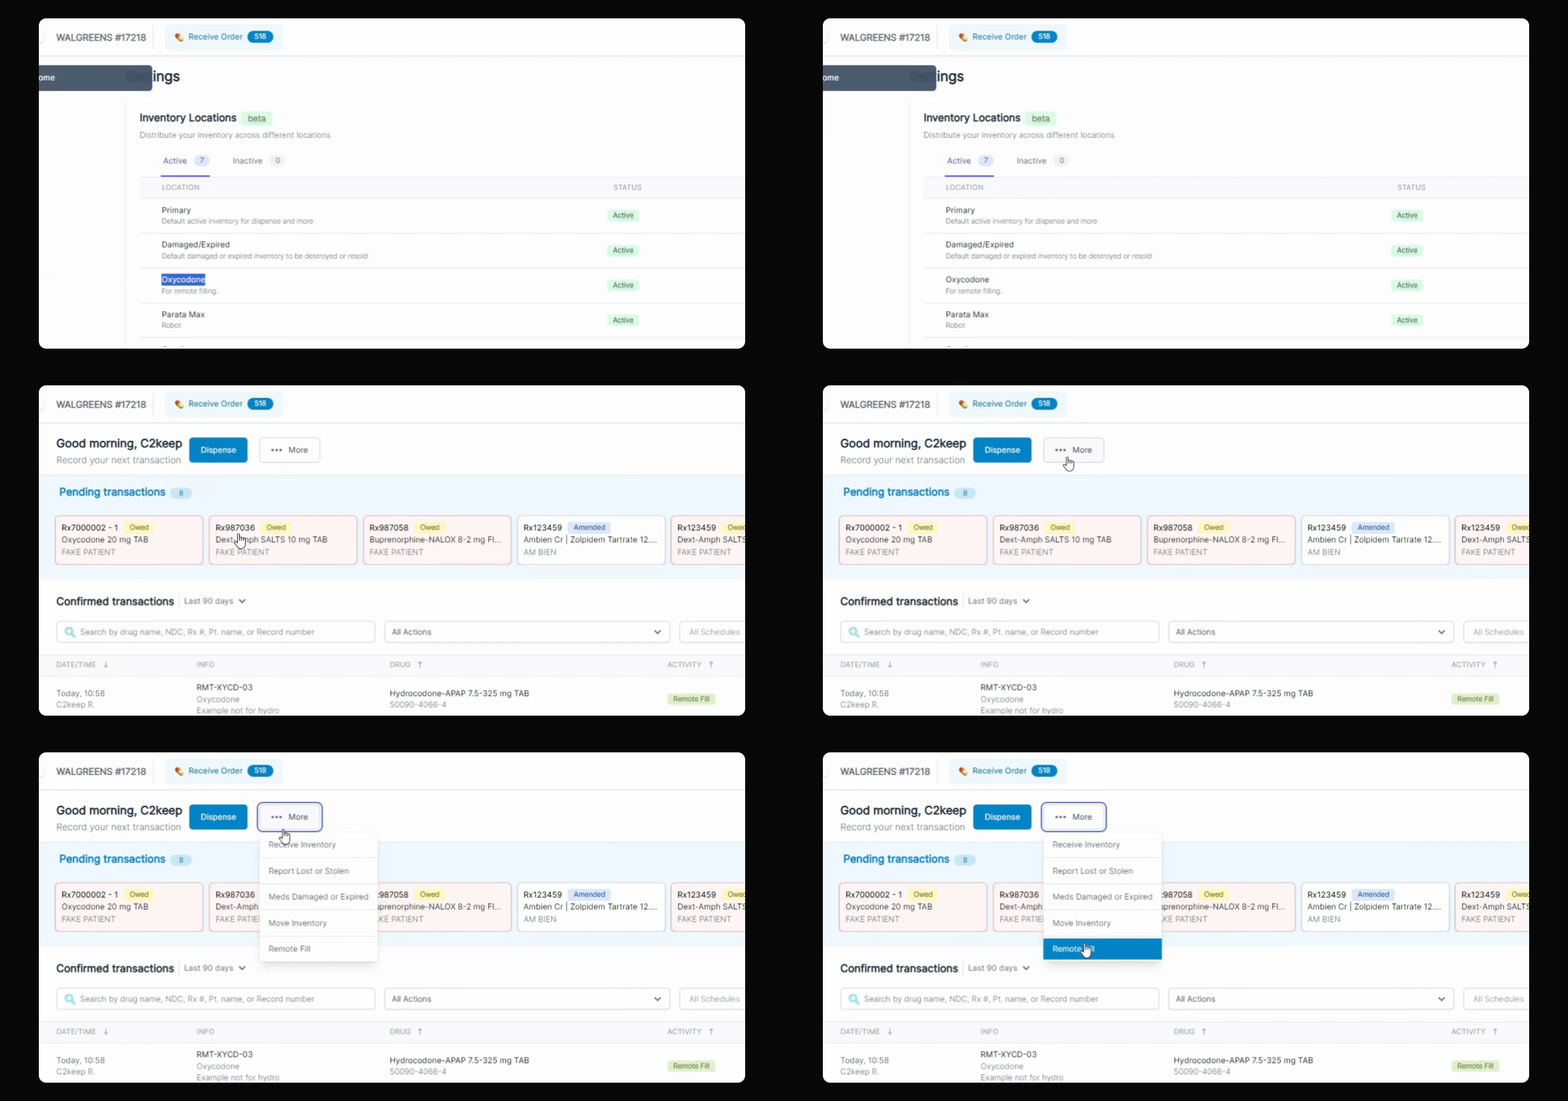
From the dashboard, click the More button, then select Remote fill.
Step 2: Choose Inventory Location
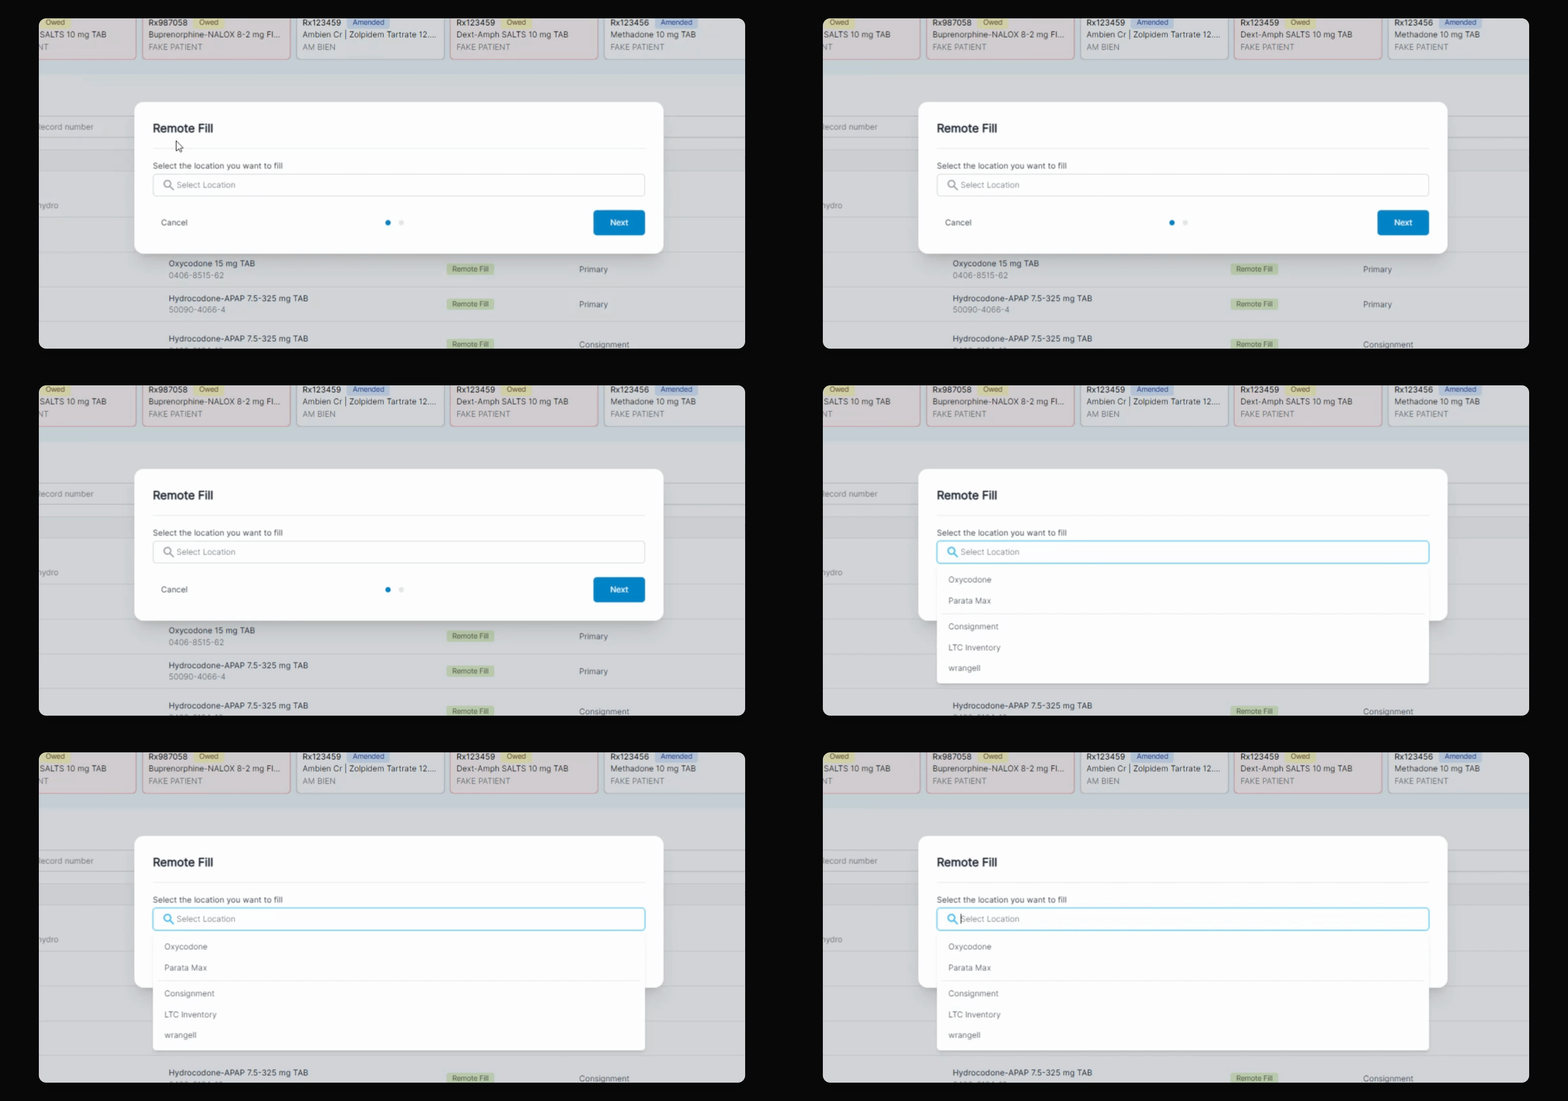
Select the inventory location you want to remote fill. Locations are listed alphabetically, with priority locations at the top.
Step 3: Select NDC and Proceed
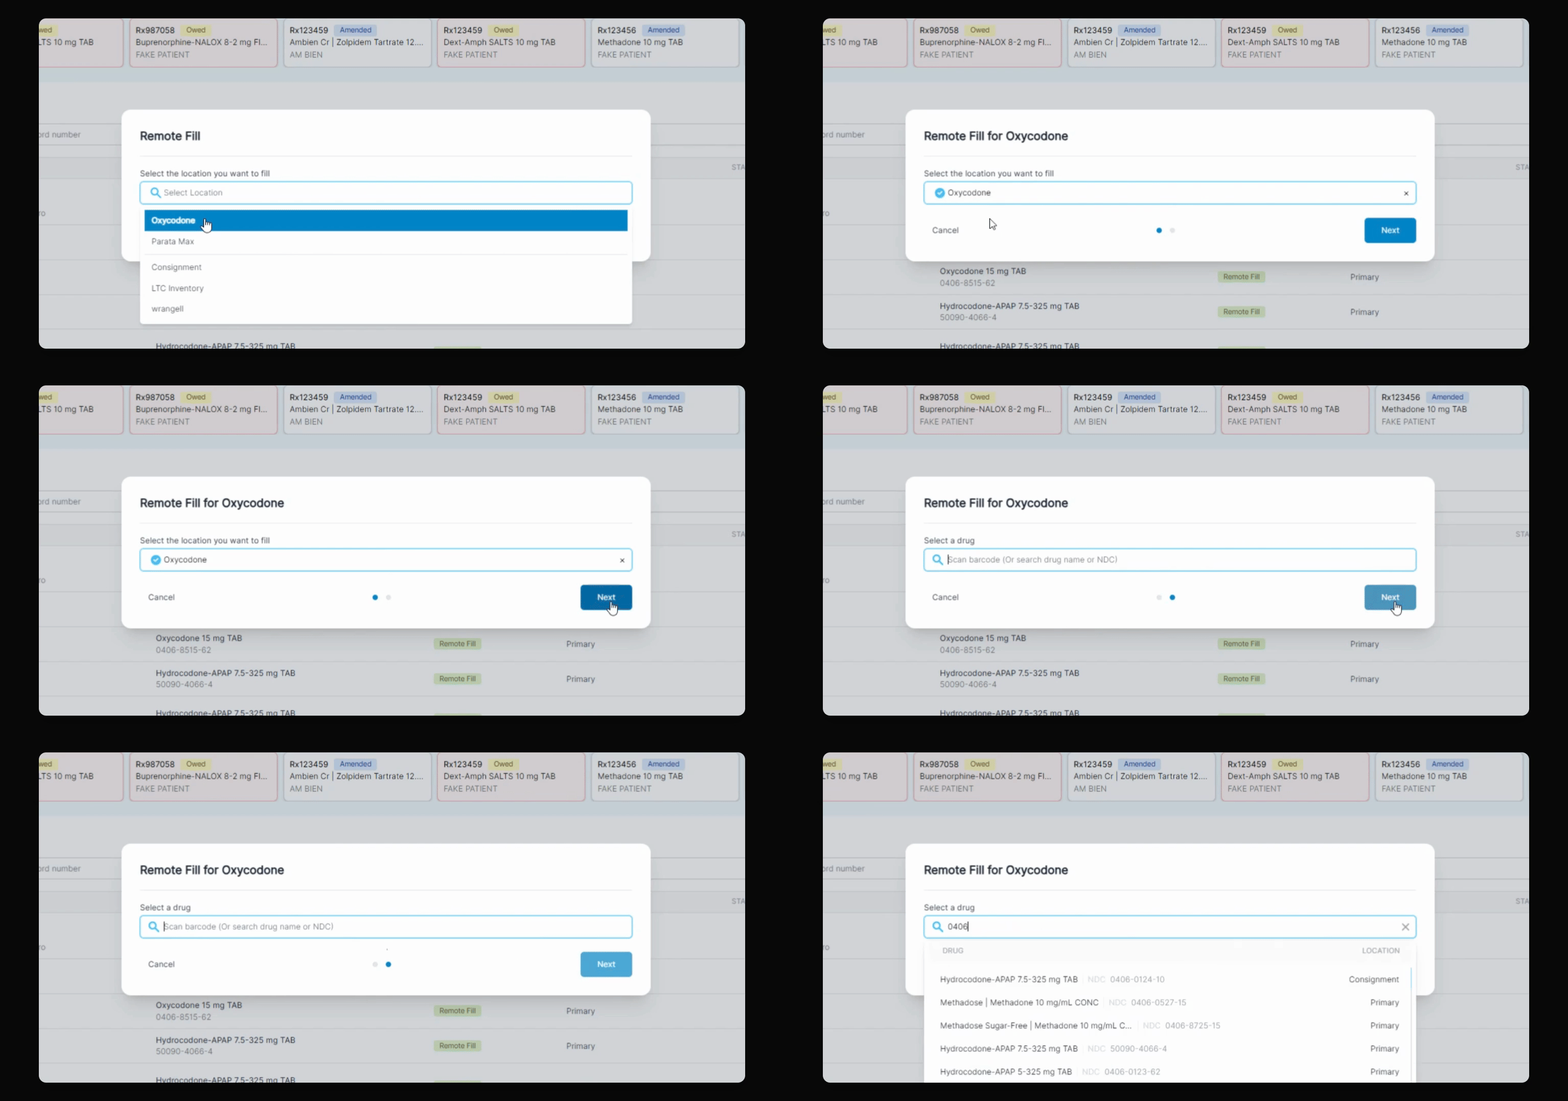
After you pick the location, click Next, and find the NDC you want to remote fill.
Step 4: Review and Enter Details
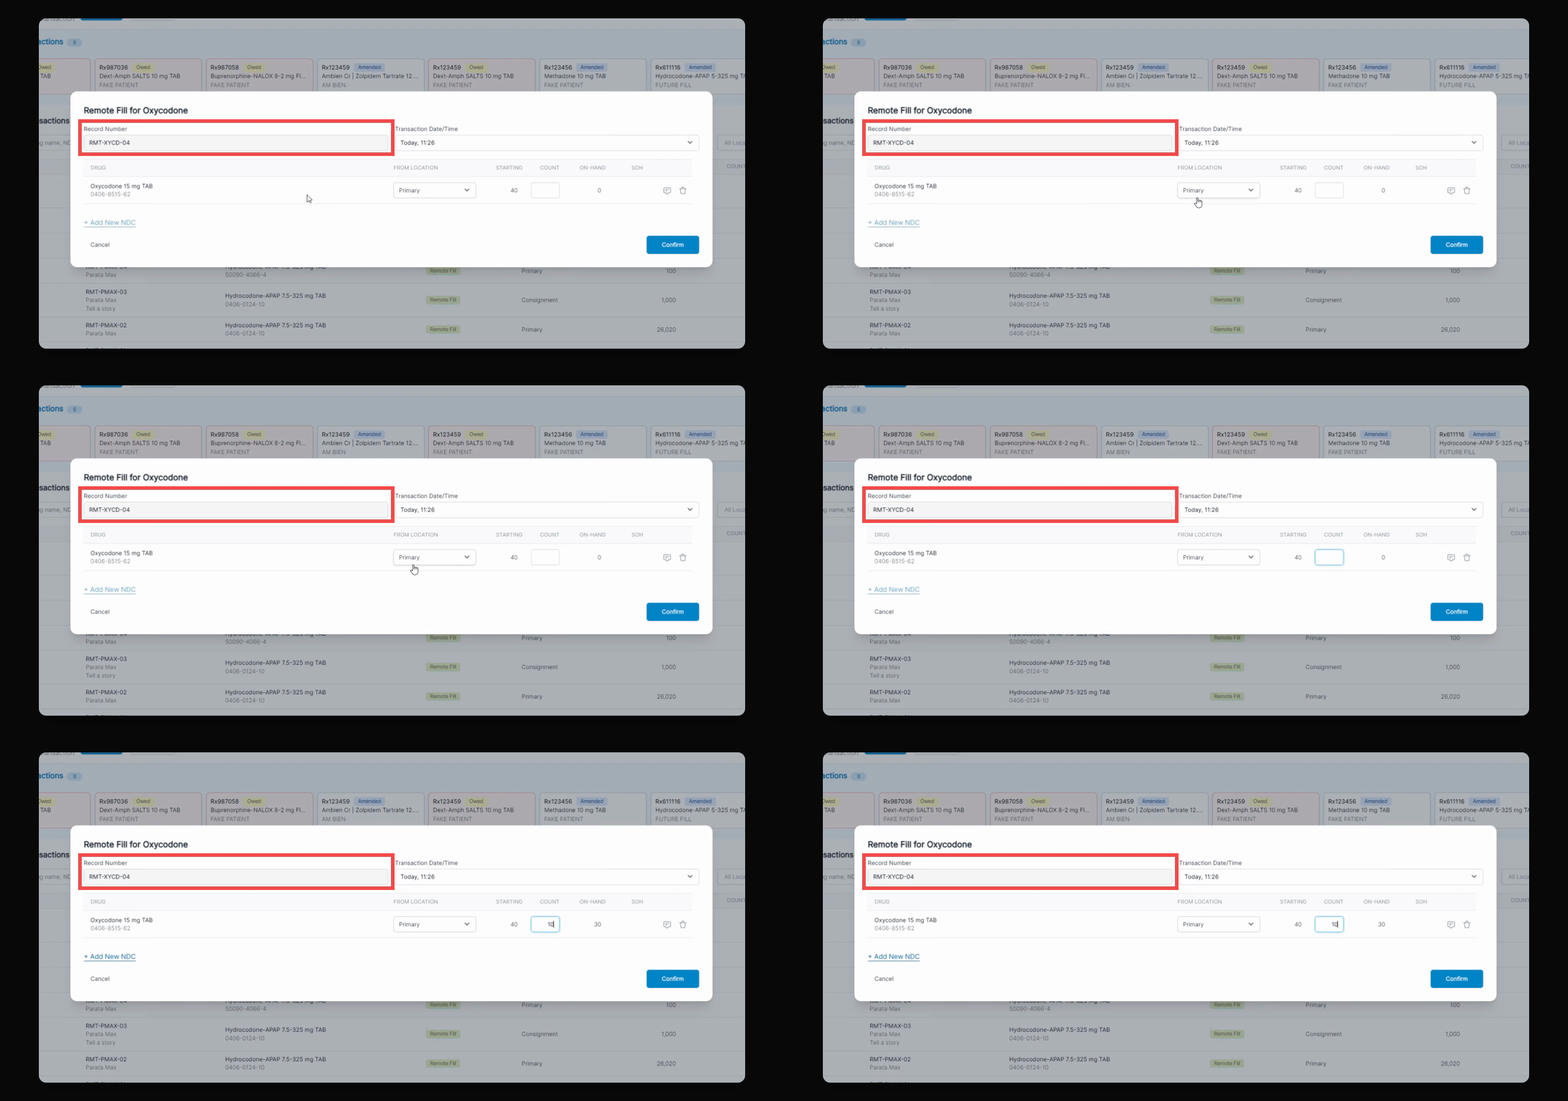
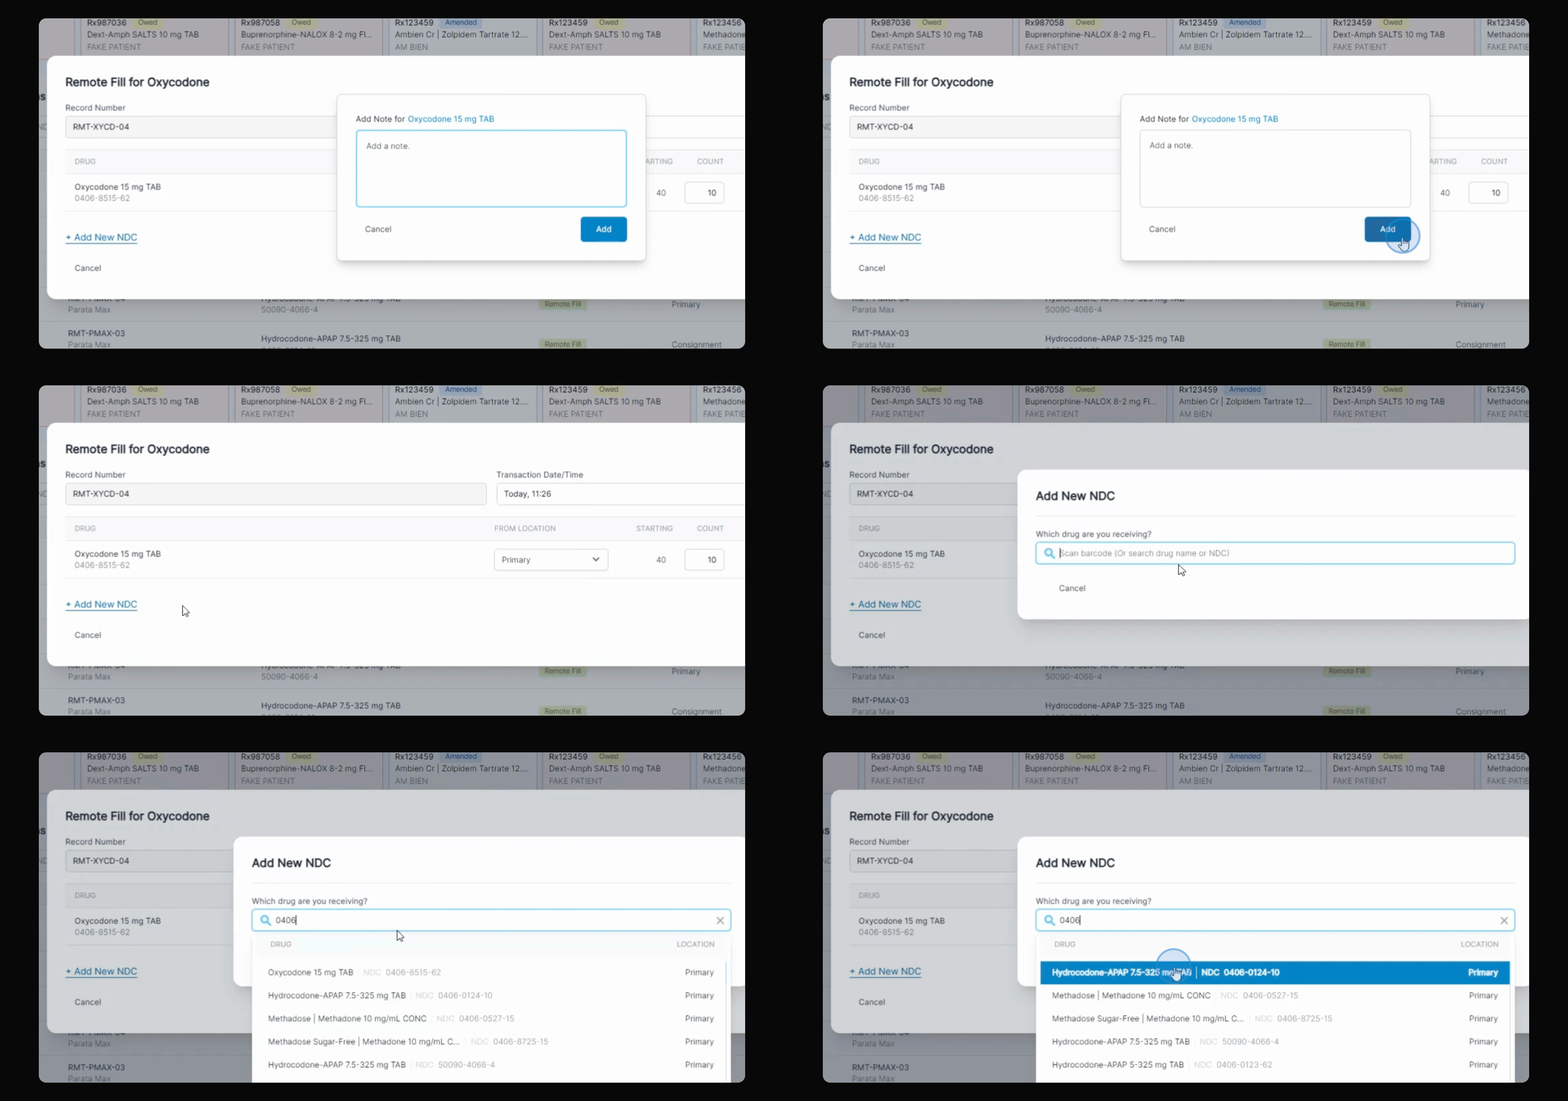
The system generates a record number based on the location and previous transactions. Review the drug and location, then enter the quantity to remote fill. Optionally, add a note.
Step 5: Add More NDCs if Needed
You can add additional NDCs and their quantities to the same remote fill transaction. When multiple NDCs are added, the record number changes to indicate multiple entries, but each NDC will still have a unique record number for tracking.
Step 6: Confirm and Finalize
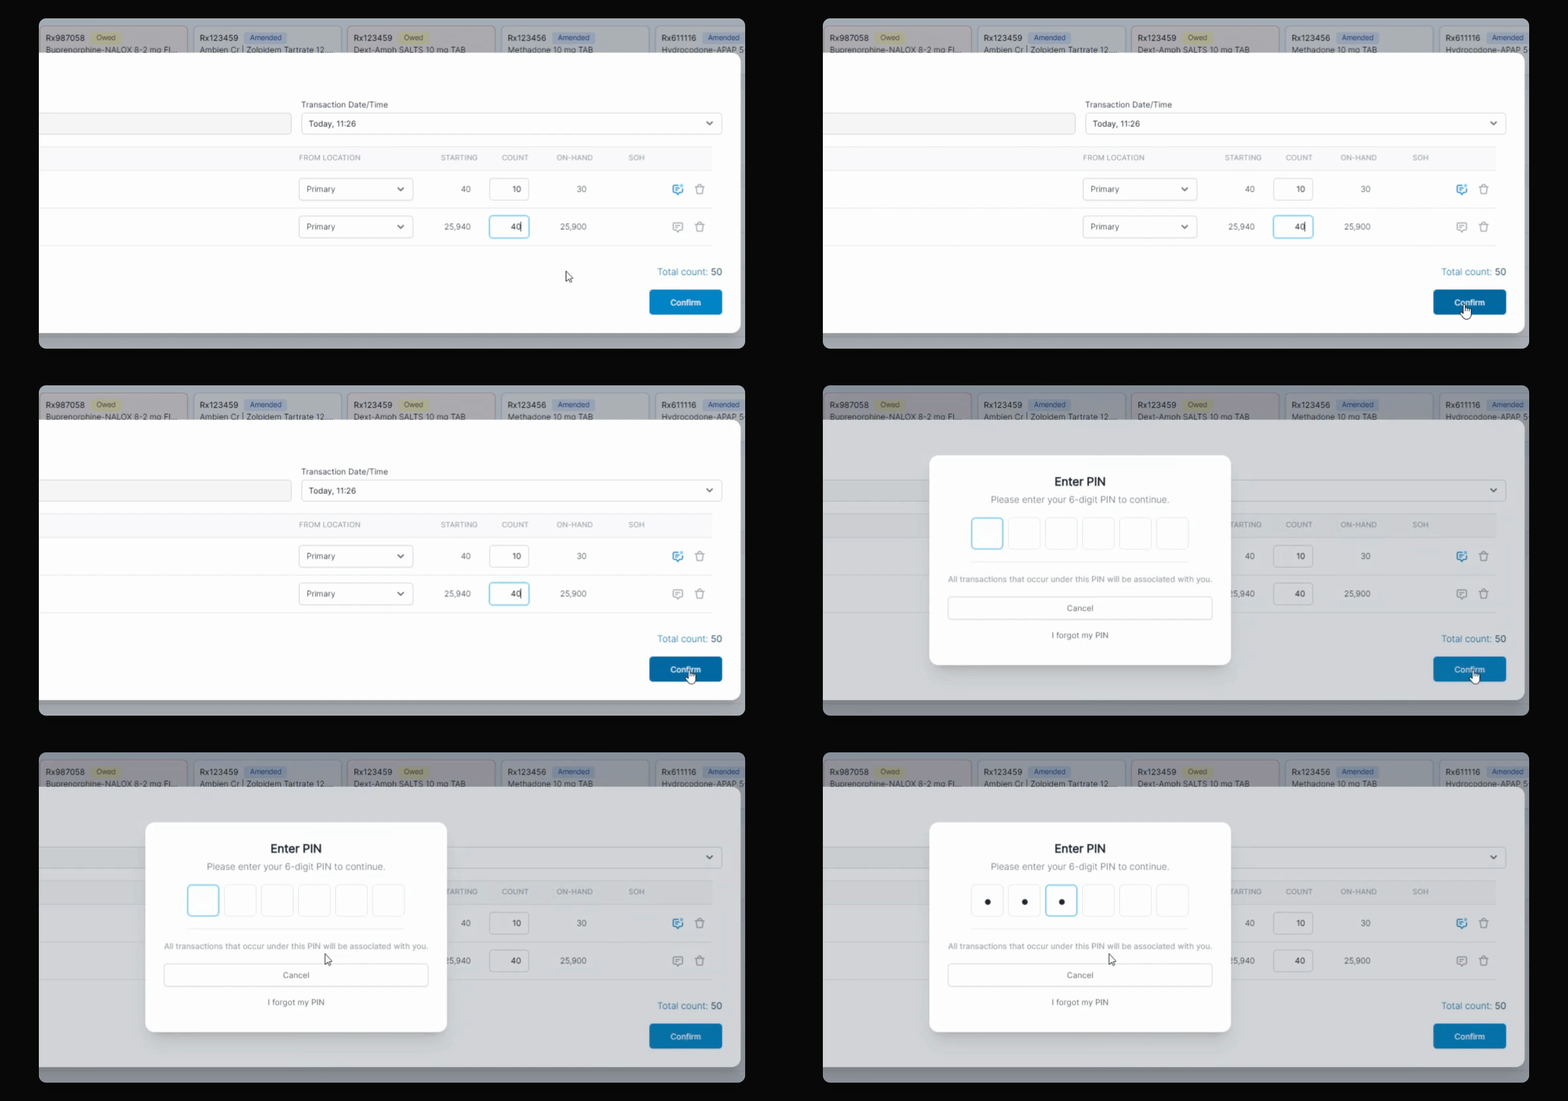
When finished, click Confirm, enter your PIN, and the system will generate the records. You will see confirmation of the remote fill numbers for the selected location.
This completes the process of recording a remote fill transaction.