

After configuring SSO, you can set up provisioning within C2 Keep. Let's look at the steps:
Step 1: Start Provisioning Setup
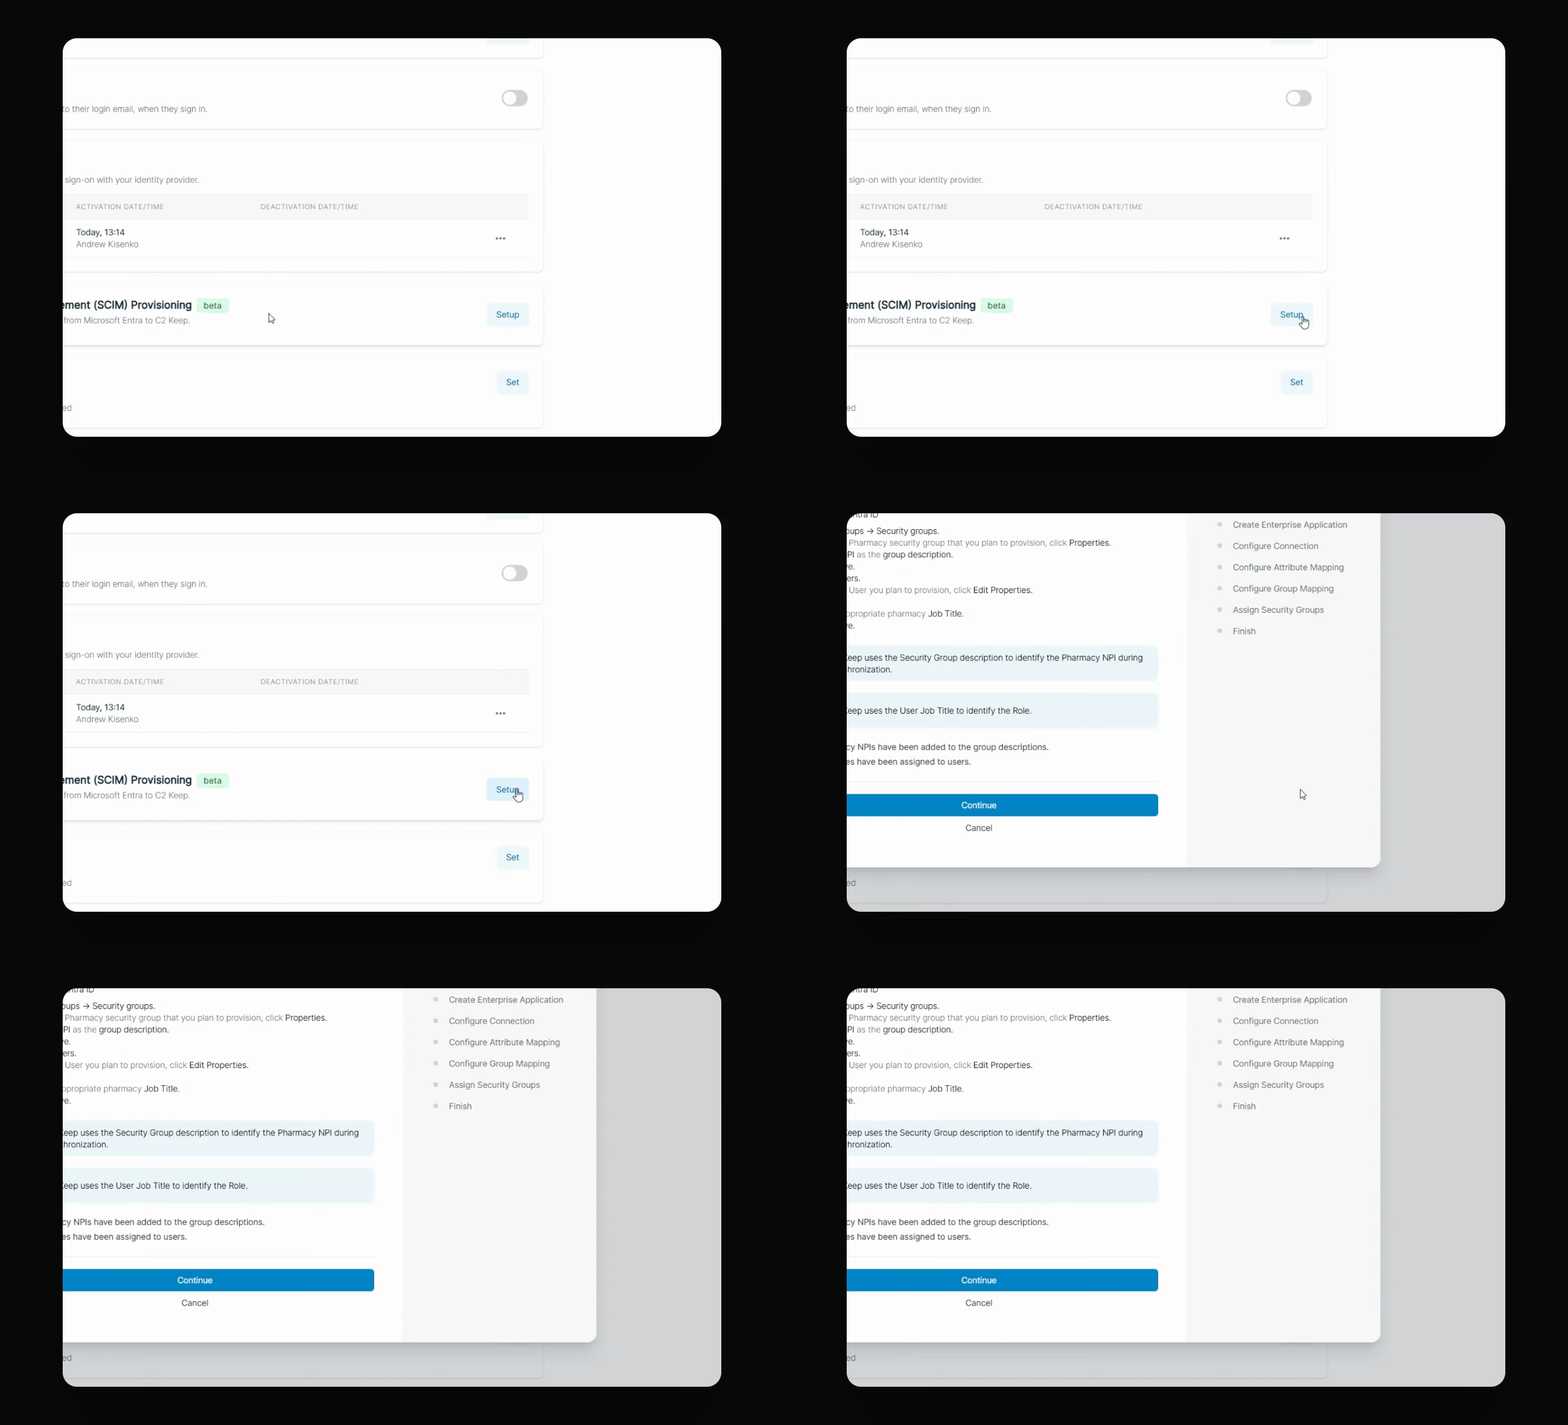
Click the Setup button next to System for Cross-Domain Identity Management (SCIM) Provisioning to begin the provisioning process in C2 Keep.
Step 2: Prepare Security Groups and Users
Follow the dialog instructions to configure security groups and users for each pharmacy in the Microsoft Entra Admin Center:
Navigate to Groups if you haven't already.
Create a security group for each pharmacy and assign the appropriate members.
Ensure each security group has the pharmacy's NPI number specified in its description.
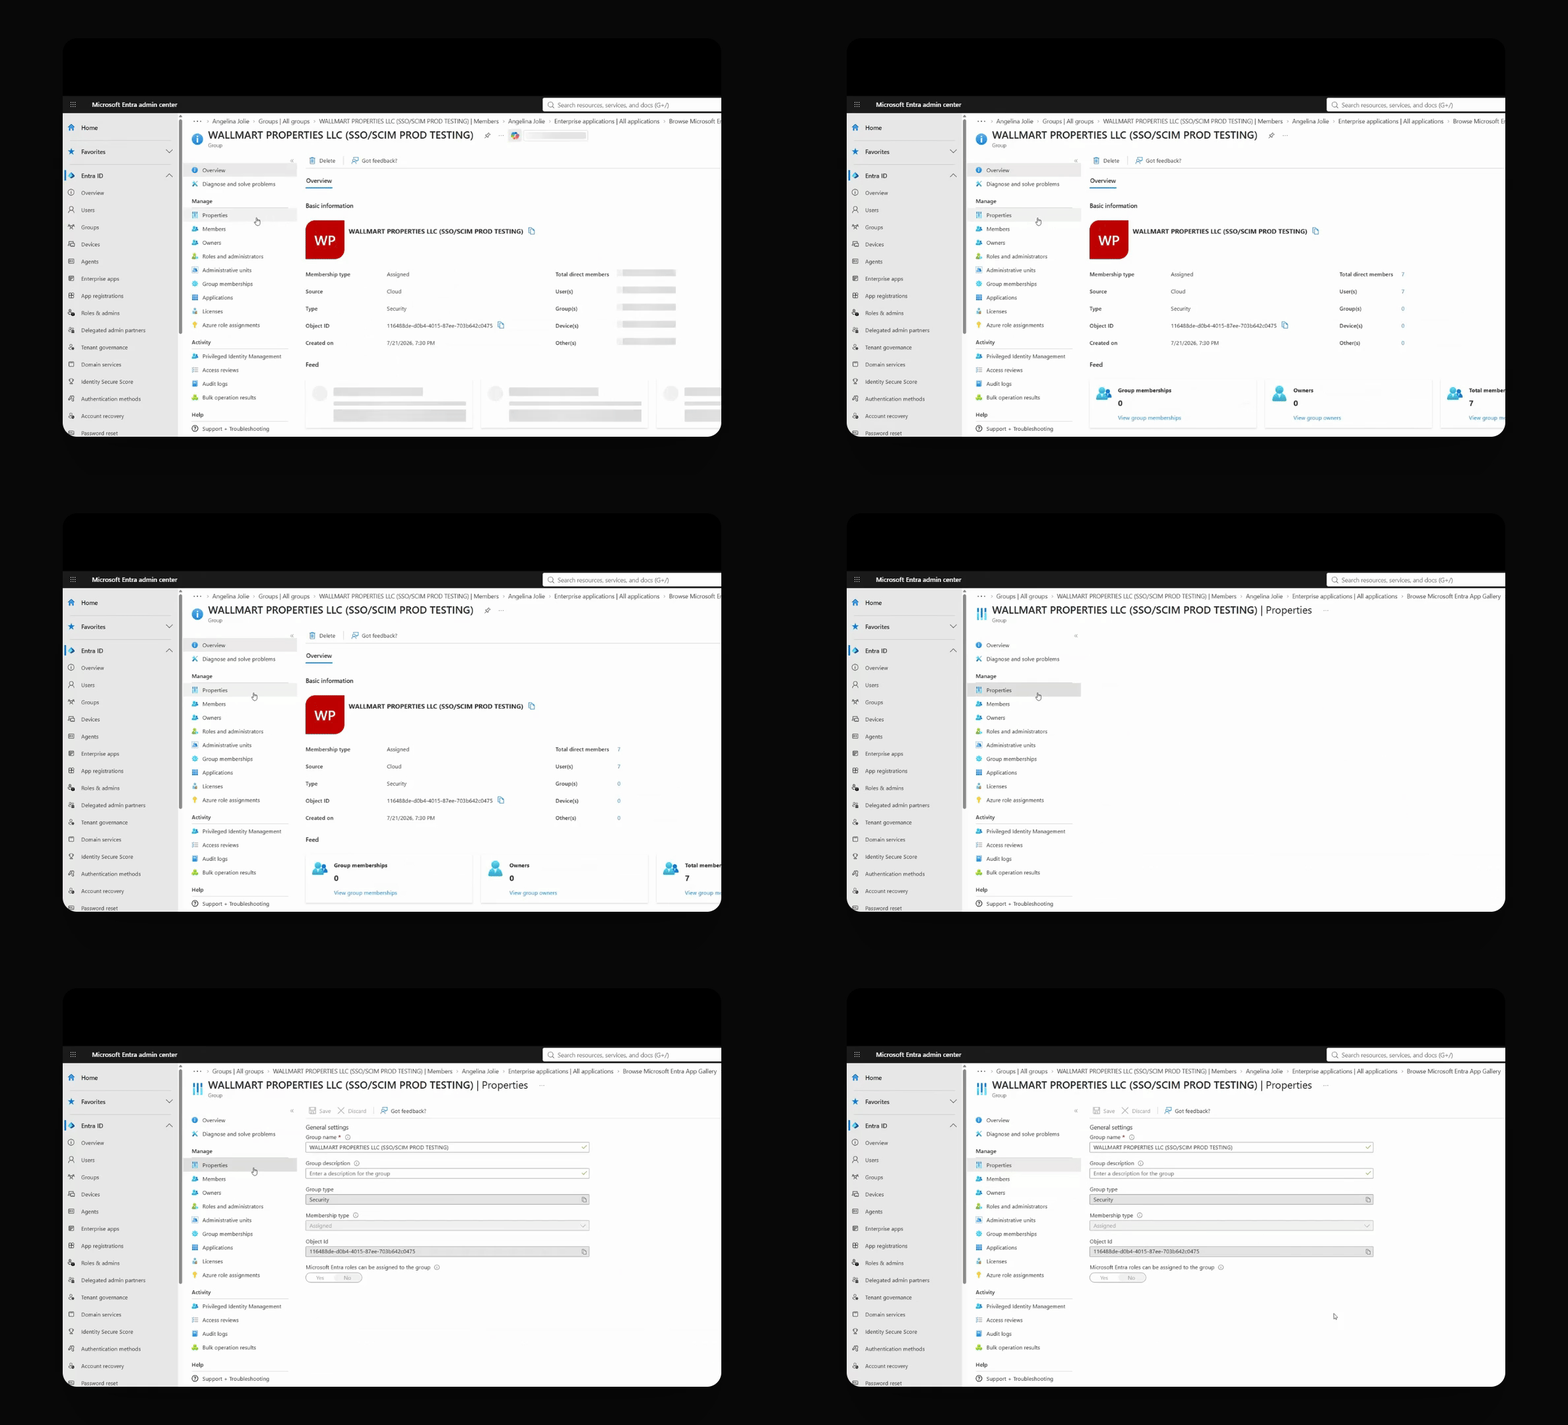
The NPI number will be used to identify each pharmacy in C2 Keep.
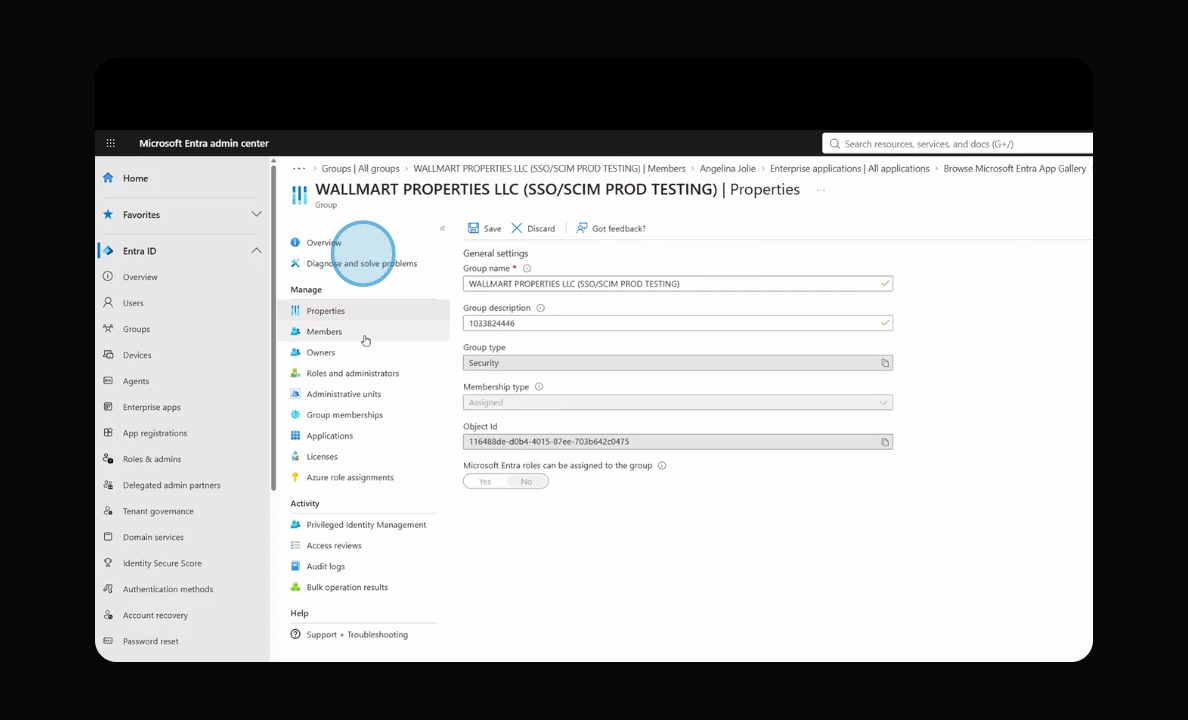
Step 3: Assign Job Titles to Users
Make sure each user has a job title assigned in their profile. These job titles will be used to map users to the correct roles and permissions in C2 Keep.
Step 4: Confirm Preparation Steps in C2 Keep
Return to C2 Keep. Check the boxes to confirm that you have completed the previous steps, then click Continue.
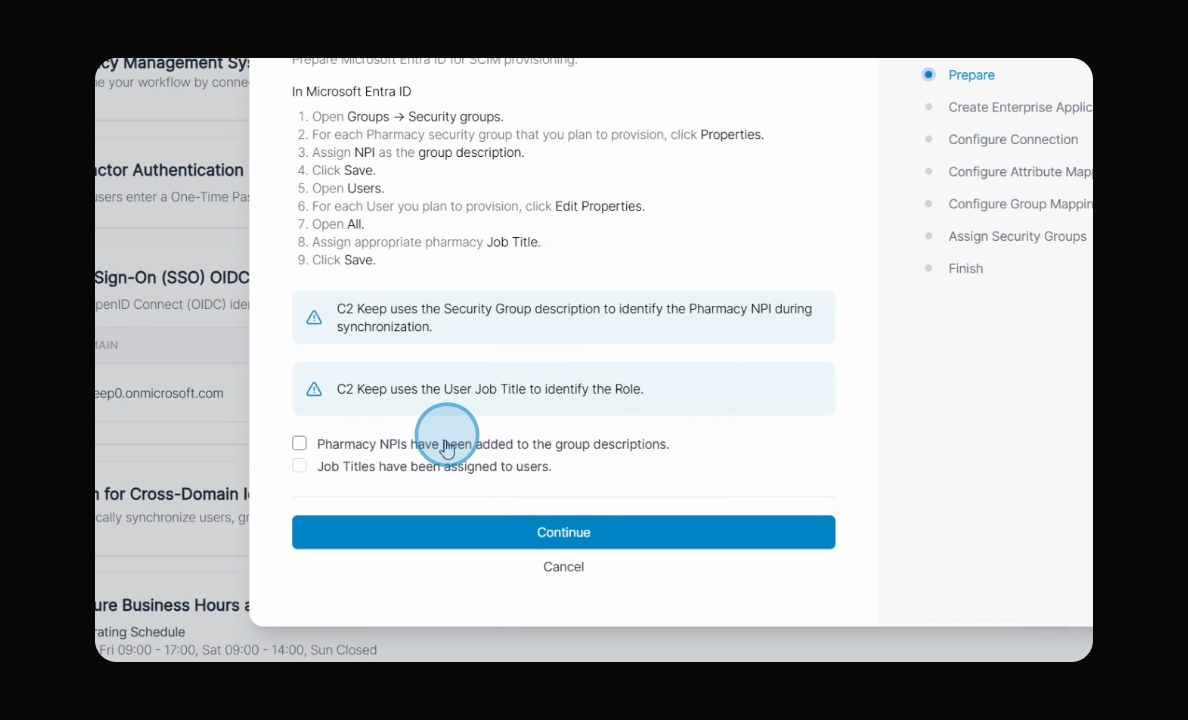
You are now ready to proceed to the next step.
Step 5: Create an Enterprise Application in Microsoft Entra
To create an Enterprise Application for provisioning:
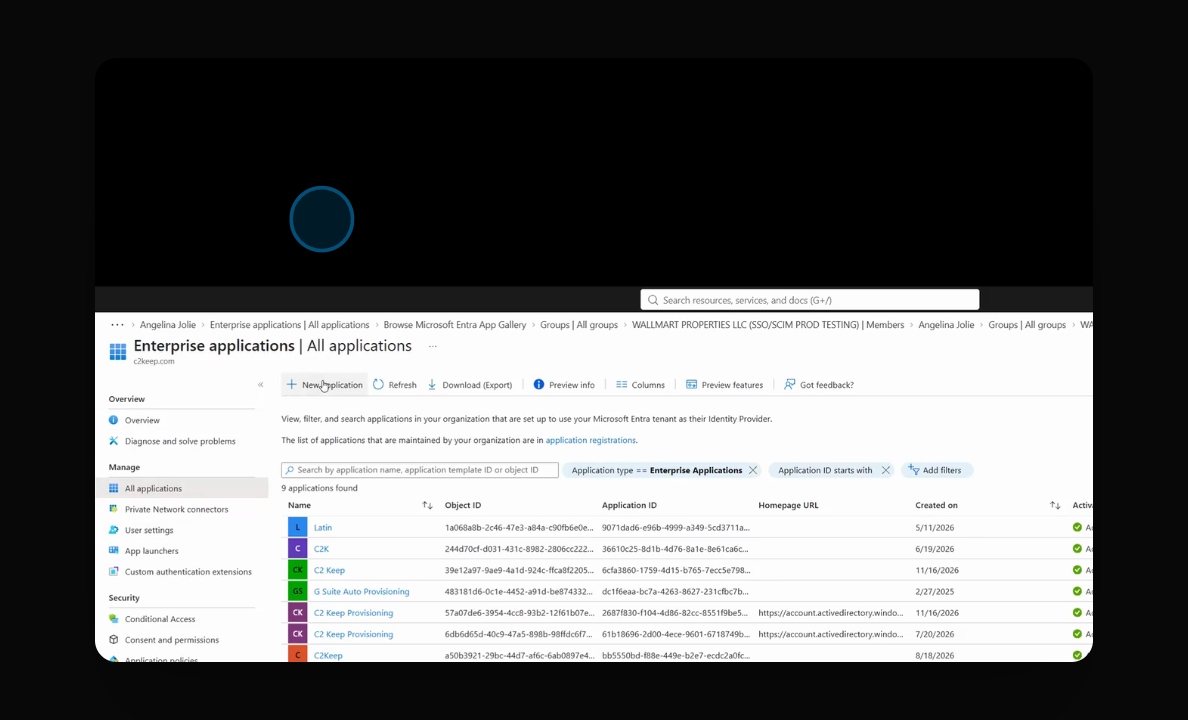
Navigate to Enterprise Applications in Microsoft Entra.
Click New Application.
Select Create your own application.
Choose the option to integrate any other application.
If the application is not found in the Gallery, click Create.
Step 6: Configure Provisioning Settings
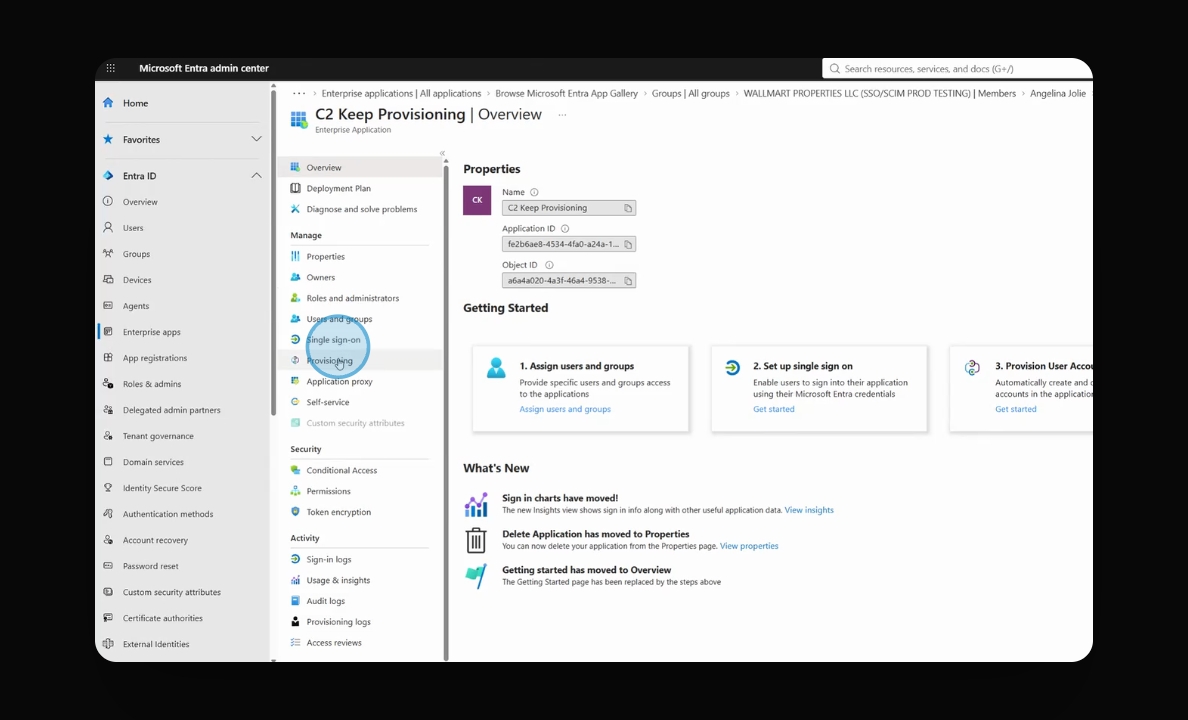
Once the application is created, navigate to Provisioning and click New Configuration.
Step 7: Confirm Application Creation in C2 Keep
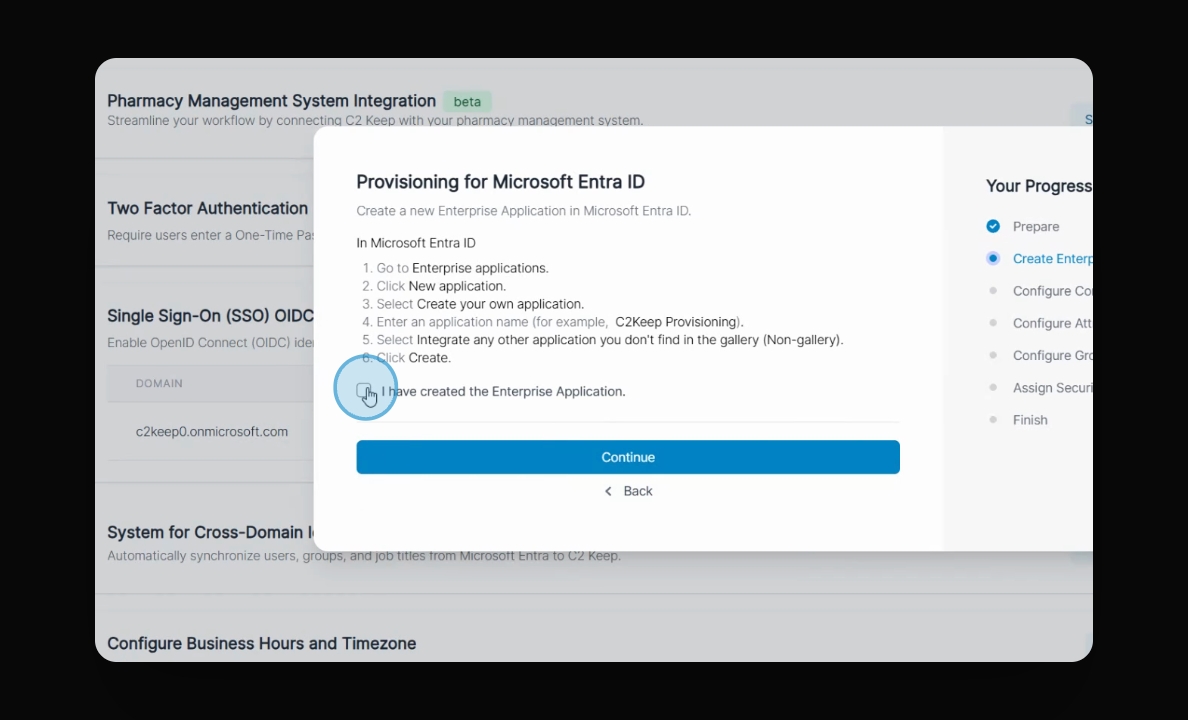
Go back to C2 Keep and check the box to confirm that you have created the application.
Step 8: Enter Tenant URL and Secret Token
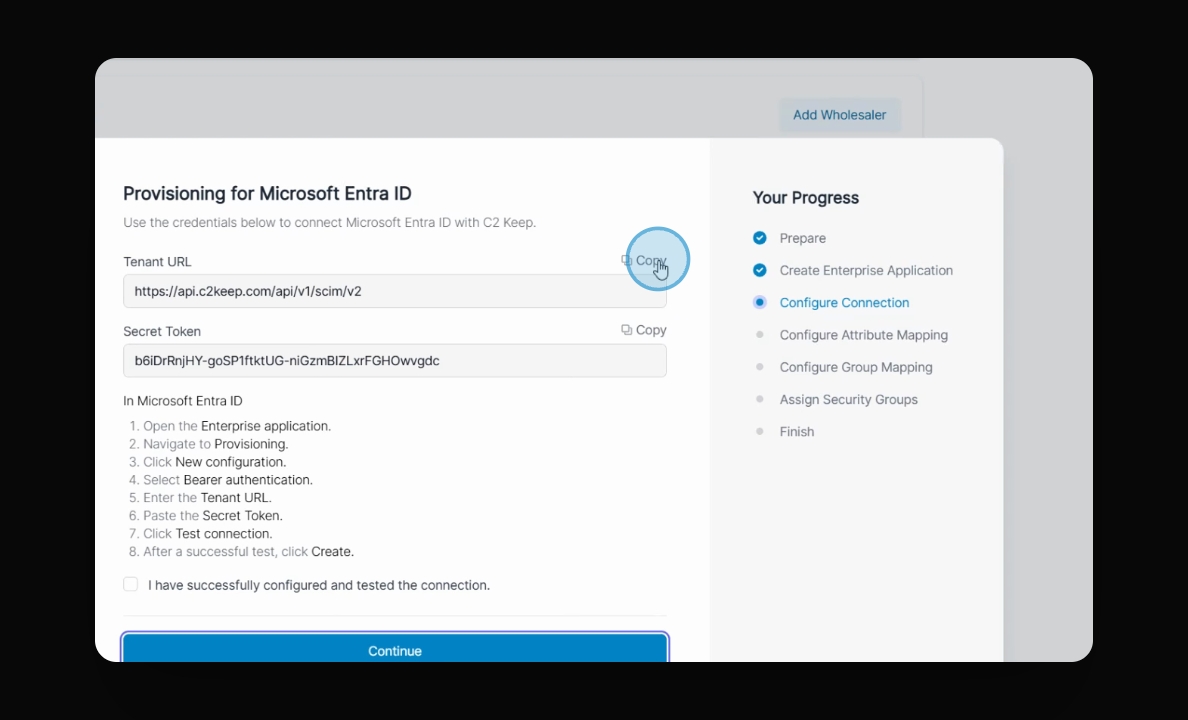
Copy the Tenant URL from C2 Keep and paste it into the corresponding field in Microsoft Entra. Repeat this process for the Secret token.
Step 9: Test and Complete the Connection
Click Test Connection to verify the configuration. If the connection is successful, click Create to finish the setup.